Rescheduling an Appointment
If an appointment is missed or cancelled, it can be rescheduled for a later date if desired.
Using Appointment Wizard
Select the patient to be rescheduled from a screen that has a Flag button, such as the Master List.
Click the Flag button (see Flags).
Click on the Search Wizard tab on the left sidebar in the Workflow View.

Click on the Patient List button, which will launch the Patient List screen.
Search for and select the appropriate patient.
Click on the Recall Last Flagged button, which will populate the screen with appropriate flagged appointment information.
Using the Starting Date field icon, select the appropriate appointment date.
Using the Start and End Time field dropdown arrows, enter the preferred timeframe of the appointment.
Click on the Search button. The appointments matching the criteria will display in the Appointment Choices area of the screen. If the appointment choices displayed are not acceptable, change the appropriate criteria and search again.
Choose an appointment and click on the Set Appointment button.
Complete the Confirm Appointment screen as needed. The information entered in the Referral Source, Appointment Note, Authorization Note, and Authorization Number fields on the original appointments will copy over and display on the Confirm Appointment screen for the rescheduled appointments.
Click on the OK button to save the information entered into the Confirm Appointment screen and complete setting the appointment.
Using the Books View
Click the Books View button on the Workflow Views screen.
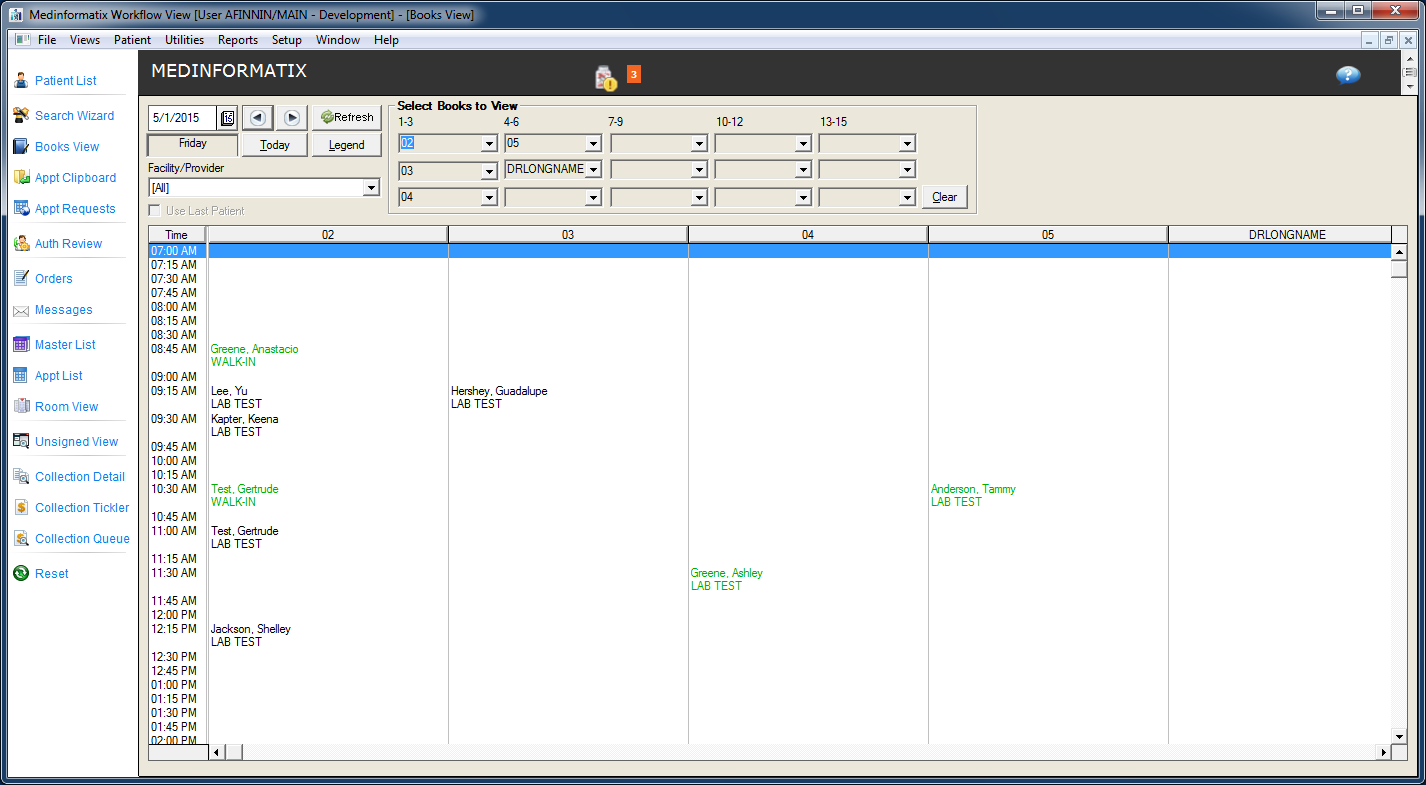
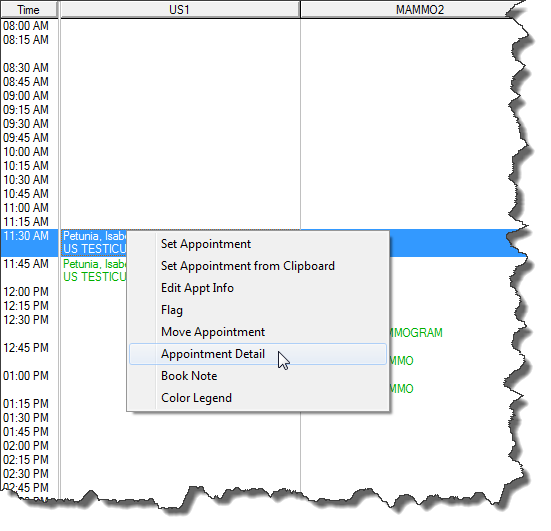
At the Books View screen, right-click in the desired Book column.
Click on the Appointment Detail option to display the appointments for that book.
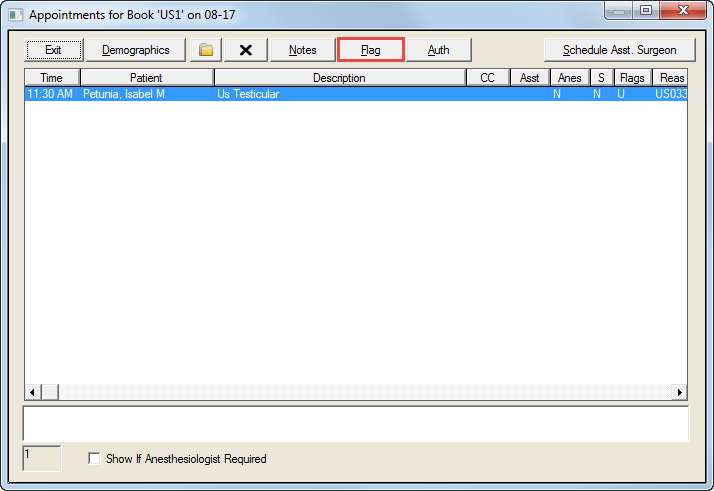
Highlight the appointment to be rescheduled and click on the Flag button, which opens the Appointment Flags screen. The Appointment Clipboard opens with the rescheduled patient displayed.
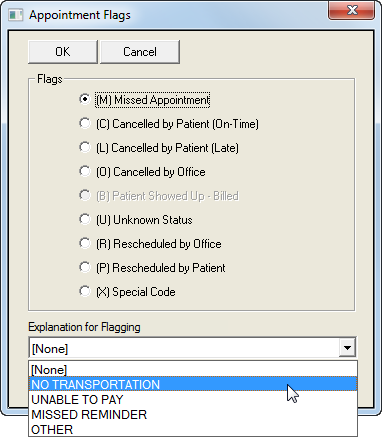
Select the appropriate flag and then click the OK button so that the appointment is automatically copied to the Appointment Clipboard.
Use the Set Date icon or the Date arrows to navigate to the new appointment date.
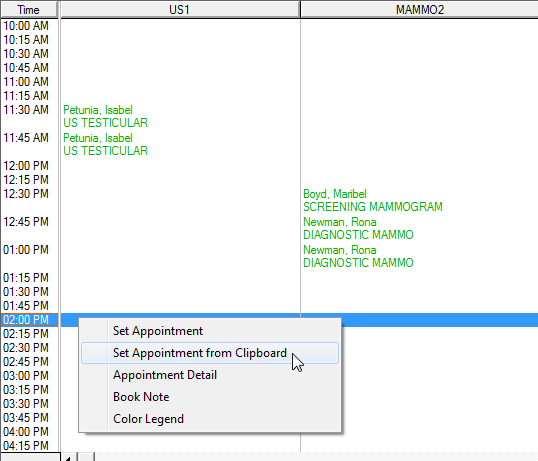
Position the mouse pointer over the desired time slot that displays Open or Ok in the Book column of the preferred provider.
Right-click on the desired time slot, and select the Set Appointment From Clipboard option.
Click on the patient name listed in the Appointment Clipboard screen .
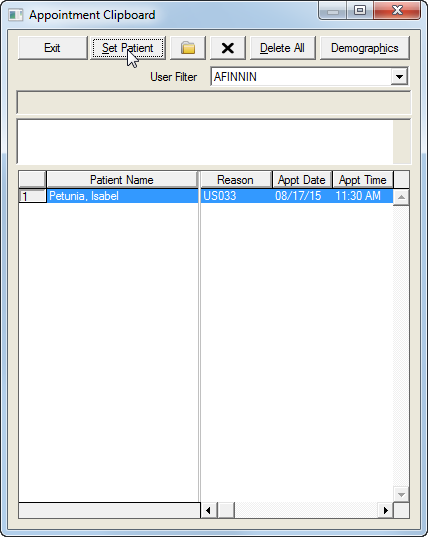
Click the Set Patient button, which will launch the Confirm Appointment screen.
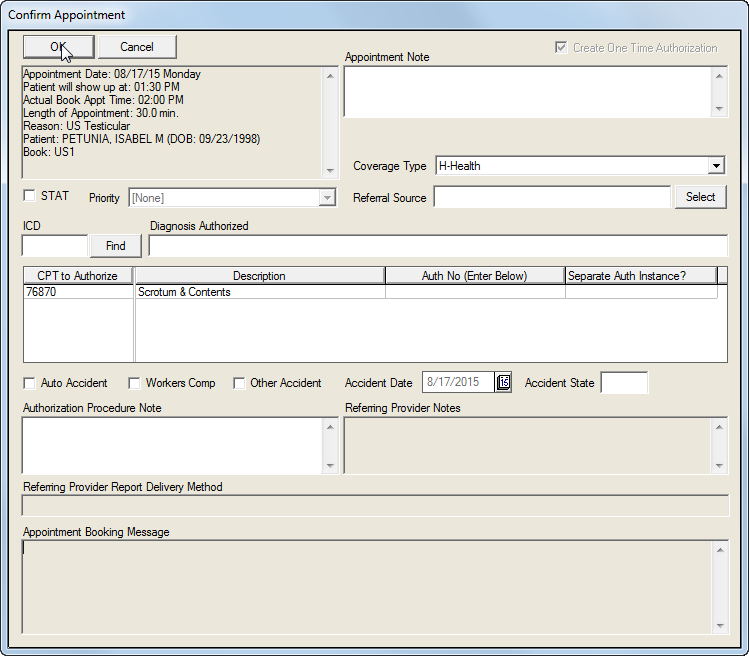
Add appropriate information if desired and/or click OK. The new appointment will appear in the appropriate column in the Books View screen.