Payment Overview
Payments are posted on the Transaction History screen. This screen is available from the Patient List, Master List and Appt List screens.
From the Patient List screen, or the Master Appointment List screen click the Payment button.
From the Appointment List screen, click the Payments button.
This screen provides charge and payment detail about the patient and allows for posting of insurance and patient (guarantor) payments.
MedInformatix is a line-item posting system, so payments and adjustments must be posted against a specific charge line item (whether on the day of payment or in the future after a charge item has been posted to the account) and not just credited to a patient account.
Move and rest your mouse pointer over various parts of the screen image below to display tips and important information about that area/button
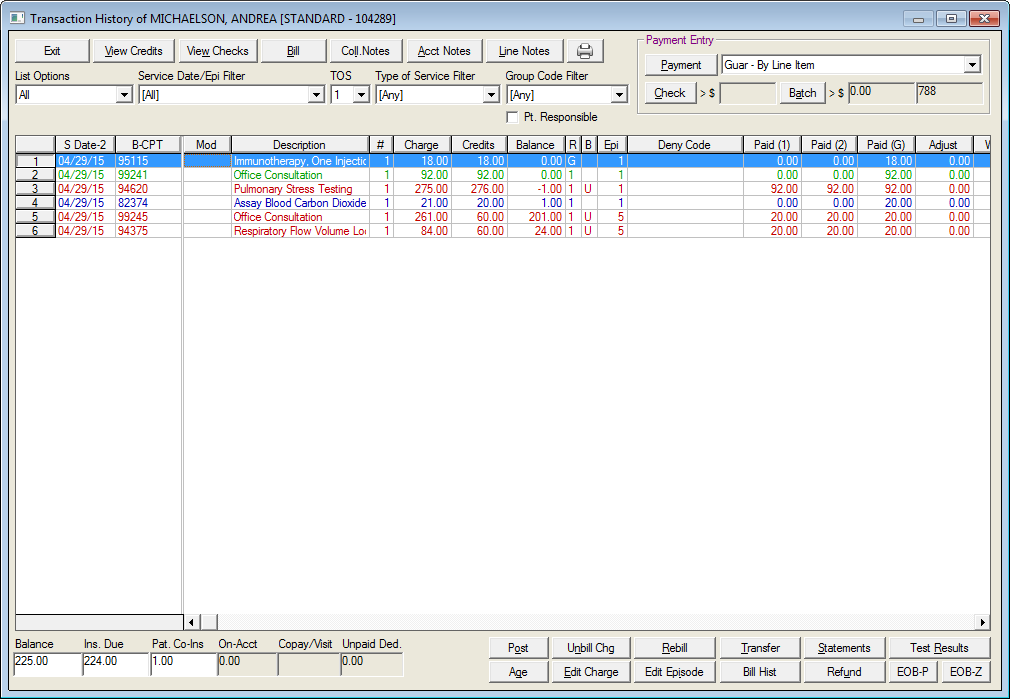
Note the Payment screen will retain the value you enter in the Service Date / Epi Filter. It will appear again when you next open the Payment screen
Transaction History Screen Color Coding
| Color | Meaning |
Green |
Charges paid in full |
Blue |
Charges posted, partial payment applied |
Red |
Charges entered, not yet posted |
Black |
Charges posted, no payments applied |
To apply a payment, see the Apply Payments topic.
To print a statement:
Click the Statements button located in the lower right hand corner of the Transaction History screen.
Enter a message in the Patient Statement Message field.
Click the Print Statement button.
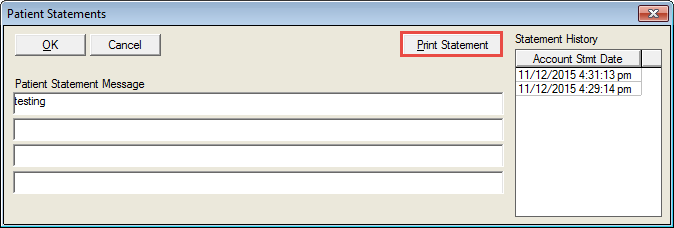
Printing a single statement writes to the statement history upon completion of the printing process.