Setting up an Appointment Wizard
The Appointment Wizard feature enables users to accommodate for each sequential scheduling situation by pre-defining them for quick selection by a scheduling user. Appointment Wizards also have the capability of being saved into Wizard Groups for better organization of large numbers of wizards.
The Appointment Wizard Group
Appointment Wizards have the capability of being saved into Wizard Groups for better organization of large numbers of wizards. To organize the wizards, Appointment Wizard Groups can be created to assemble together like wizards or wizards that may be used in conjunction of one another. For instance, a user could create a Wizard Group for all of the Mammography wizard appointments that have been setup in their system.
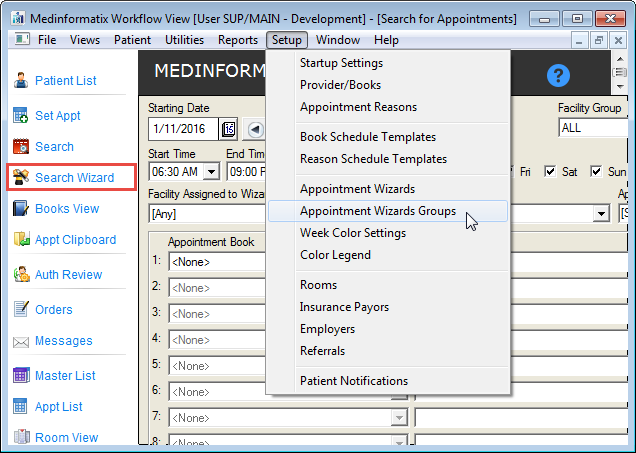
Click the Setup menu option on the Workflow View.
Click the Appointment Wizards Groups option.
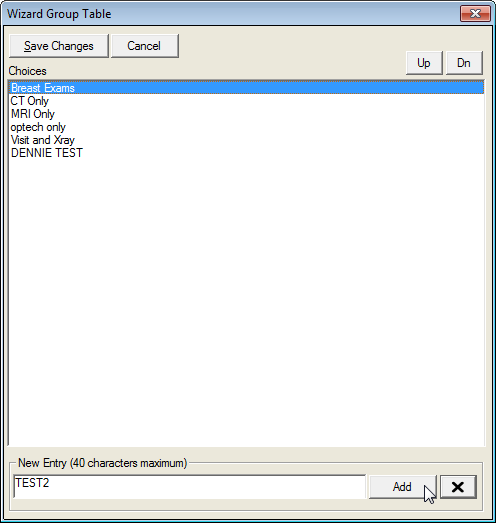
Enter in the name of the new Wizard Group in the New Entry field.
Click the Add button to add the Group to the list.
Click the Save Changes button to exit the screen.
The Appointment Wizard Table
When creating a new Appointment Wizard, the selected book and reason pair may be given its own lag time, which is the time the book appointment will start relative to the starting time of the appointment. The system will automatically calculate the lags based on the length of the appointment so that setup is easier and not subject to mistakes. In addition to the normal lag time combo box that a user may select, there is also a Day combo box that can be used to select the number of days past the original day you would like to book an appointment.
Often, a particular exam type or appointment reason may require pre-exam preparation steps completed by a Technologist prior to the scheduled exam. The Appointment Wizard allows the appropriate time to be scheduled with each care provider individually, while reflecting the overall appointment start for the patient and the reception desk.
When the Appointment Wizard is searching for time slots, the system will try out all available books before moving to the next time slot. A feature called Future Day Flex Time allows for flexibility in the next day’s appointment. If set at zero, the system will assume that the start time for all of the appointments being scheduled must match the first appointment being set.
Appointments set using the Search Appointment Wizard feature are assigned a unique wizard ID that identifies the appointments as part of a set. Because of this, when appointments scheduled using the Search Wizard feature are flagged or deleted, they will be handled together.
Click the Setup menu option on the Workflow View.
Click the Appointment Wizards option.
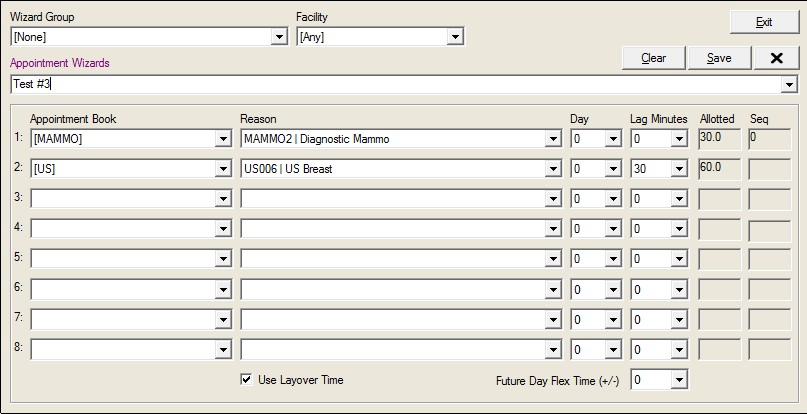
Select the desired facility from the Facility dropdown list.
Enter the desired wizard name in the Appointment Wizard field.
Select the appropriate appointment book for the appointment wizard using the Appointment Book dropdown list.
Select the appropriate reason using the Reason dropdown list.
Continue selections in the remaining rows until all appointment reasons necessary for the wizard have been included.
Select the appropriate lag times using the Lag dropdown list.
Note: Lag time is displayed in increments of 15 minutes and tells the system when any subsequent appointments in the wizard should be scheduled.
Select the appropriate day lag that should be applied to the appointment using the Day dropdown list, if necessary.
Note: Day lag time is tells the system how many days after the original appointment it should look when scheduling any subsequent appointments in the wizard.
Select the Future Day Flex Time (+/-) from the dropdown list.
Note: Future Day Flex Time is used when a multi-part test needs to be scheduled. It allows for another appointment to be made within a range of times on a subsequent day.
Click the Use Layover Time checkbox if desired.
Note: The Layover time cannot be changed by the user. It is set globally at installation.
Click the Save button