Send and Receive Messages
The message link allows the user to send and receive messages regarding the patient and his or her treatment. These messages can be sent to internal staff or to a potential portal account, where it can be sent directly to the patient or to the patient’s authorized agent.
To view all the messages sent to a particular user:
Click the Messages button on the Workflow Views screen.

The Messages inbox for the individual user will open, showing all the messages which have been sent to that user.
This message screen can also be accessed by clicking the envelope icon located along the top of the screen. The number in the red square shows the number of messages waiting to be read.

-
Move and rest your mouse pointer over various parts of the screen image below to display tips and important information about that area/button

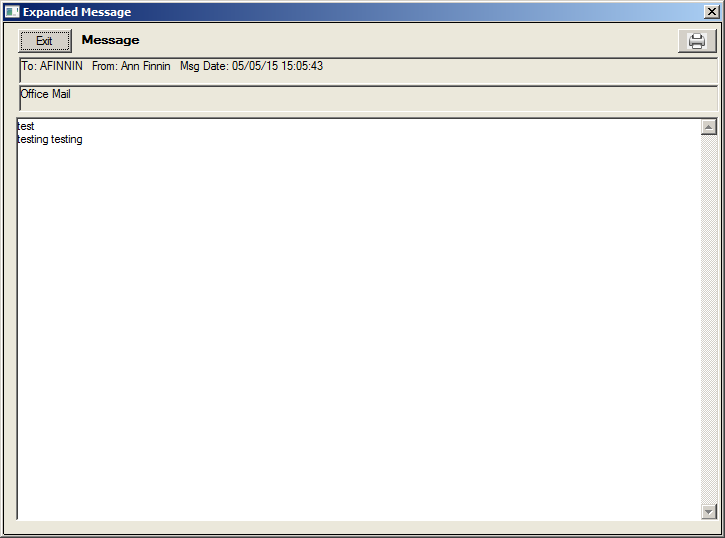
Select the desired message and click the Expand Message button to open.
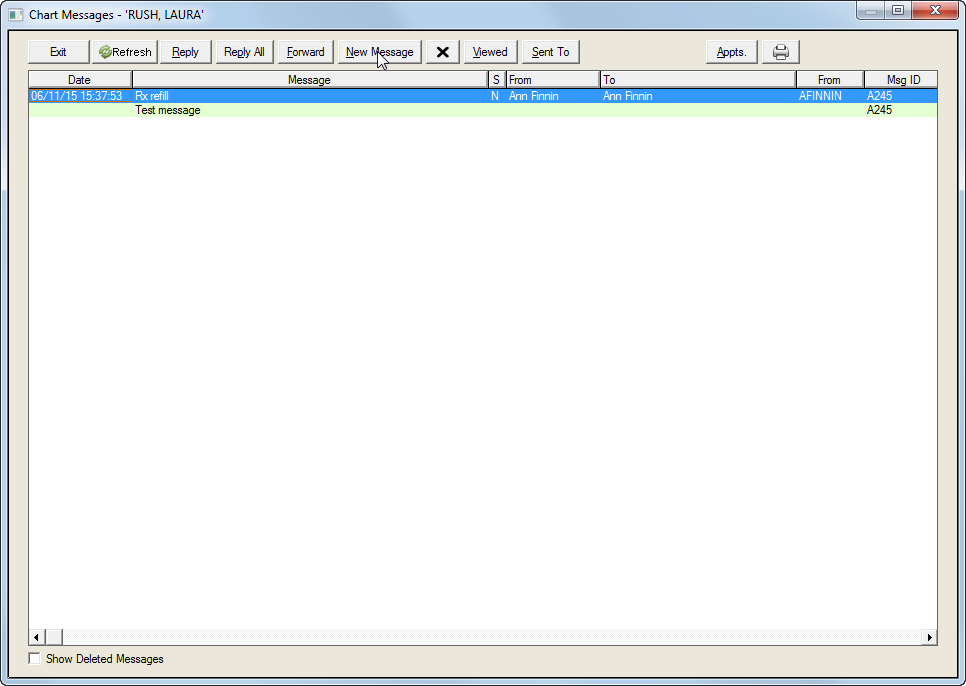
To view messages regarding a specific patient:
Click the Message button to open the Chart Message screen. The message function can also be accessed through the Lab function and the Notes function.
Click the New Message button to open the Send New Message screen.
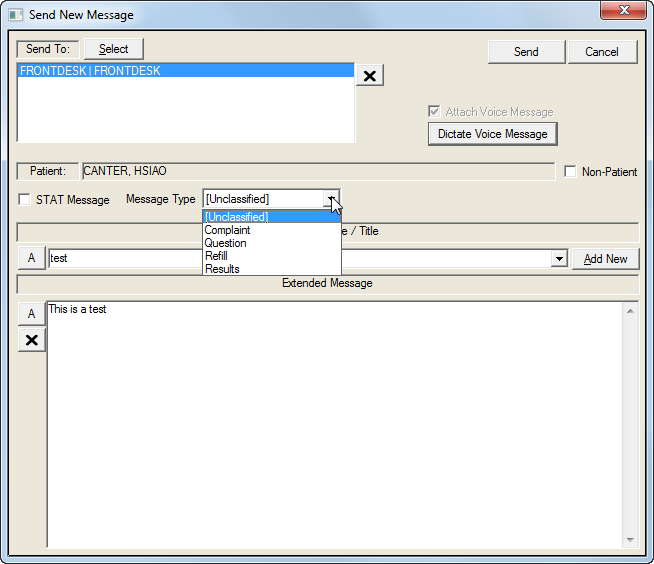
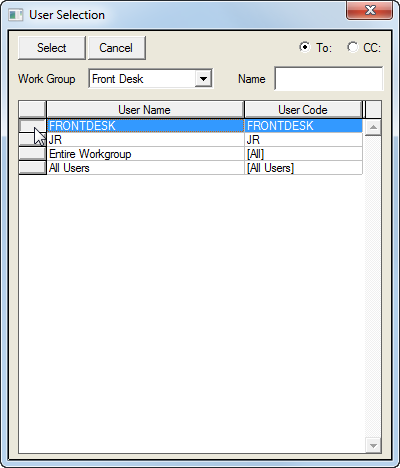
Click the Select button to select the recipient or Work Group from the User Selection pop-up list.
Click the Dictate Voice Message button to open the online recording function.
Click the STAT Message box if applicable.
Select the Message Type from the pull down list.
Enter the title of the message into the Short Message/Title field or choose a title from the dropdown list.
Click the Add New button to add the new short message to the dropdown list. Note: This button will be disabled unless the Add To Short Message List=1 in the [DIM] section of the Workgroup Profile file.
Enter the text of the message into the Extended Message field.
Click the Send button.