Patient Orders
Each order is assigned a department code and specific staff members are to complete orders directed to their department. In many cases, staff members may be responsible for completing the orders in more than one department. The departments are completely customizable, so they can be adapted to match nearly any workflow design.
Some orders are created by an automated process, while others are manually generated by members of the staff. Each order has a status flag that is updated when a staff member completes the order and it is marked as ‘Done’. Likewise, when selecting an Order Item, the record will be flagged as being in use and subsequent users pulling up the same Order Item will get a message advising them that another user has the order open and asking if they would like to continue into the order. All Order Items that are locked by another user will appear as grayed out on the Orders List.
Click the Orders button on the WorkFlow View menu.
The Orders screen will open.
-
Move and rest your mouse pointer over remaining parts of the screen image below to display tips and important information about that area/button.
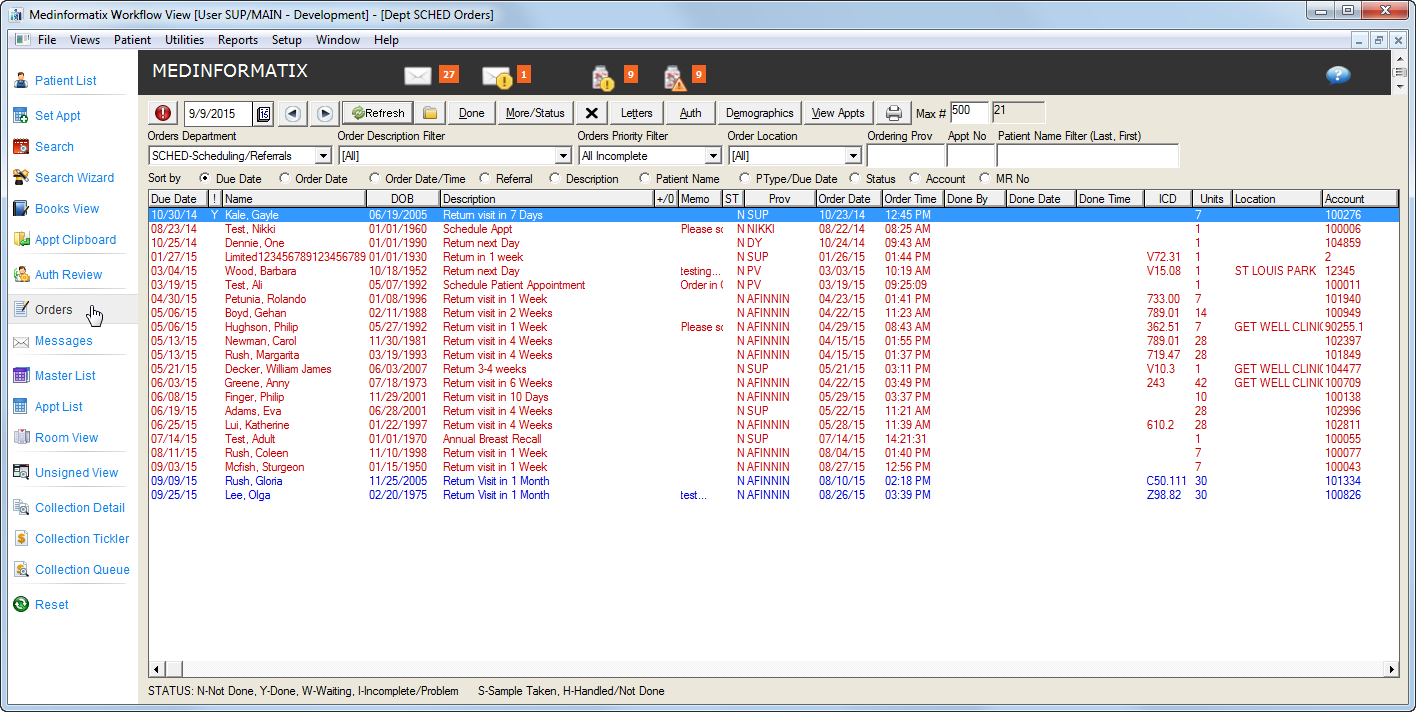
Color code meanings.
| Color | Meaning |
|
Green |
Order marked Done |
|
Blue |
Action documented, marked Incomplete or Not Done |
|
Red |
Order past due |
Use the Orders Department dropdown list to select the department code of orders to be worked and click the Refresh button.
Use the Orders Priority Filter dropdown list to select the priority for the orders to be worked and click the Refresh button.
Use the Order Location to select the location of the orders to be worked and click the Refresh button.
Use the Orders Department dropdown list to select the department code of orders to be worked and click the Refresh button.
Use the Order Description dropdown list to select the type of order to be worked and click the Refresh button.
Use the Orders Priority Filter dropdown list to select the priority for the orders to be worked and click the Refresh button.
Use the Order Location to select the location of the orders to be worked and click the Refresh button.
Enter the name of the Ordering Provider in the Ordering Prov field if desired.
Enter the Appointment number corresponding to the order in the Appt No field.
Enter the name of the patient, last name first, in the Patient Name (Last, First) field.
Click the desired button in the Sort by menu.
Click each order in the list to open the patient’s chart and perform the appropriate action. If there is more than one appointment for the patient, the Select Appointment screen will open. Choose the desired appointment and click the Select button.
Highlight the order and click the Done button when the order is complete.
To update the status of the order to another option, such as ‘Handled/Not Yet Done’, click the More/Status button to open the Order Status screen.
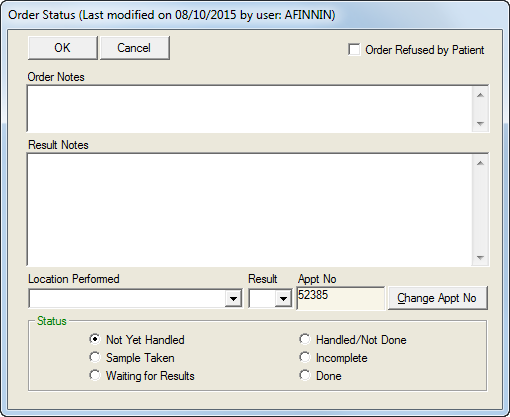
Add notes in the text boxes if desired, click the Order Refused by Patient checkbox if appropriate and select the location from the Location Performed dropdown list.
Update the Result from the Result dropdown list.
Click the Change Appt No button to open the Select Appointment screen.
Select the desired appointment and click the Select button.
To view the orders for a particular patient:
Click the Chart button on the Orders screen

Click the Orders button on the Decision Tree menu bar.
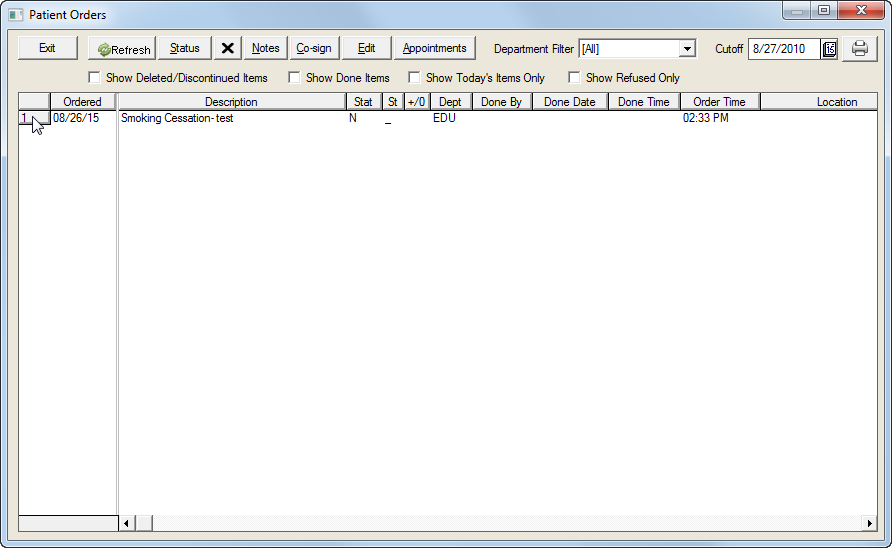
The Patient Orders screen will open.
-
Move and rest your mouse pointer over remaining parts of the screen image below to display tips and important information about that area/button.