Appointment Request View
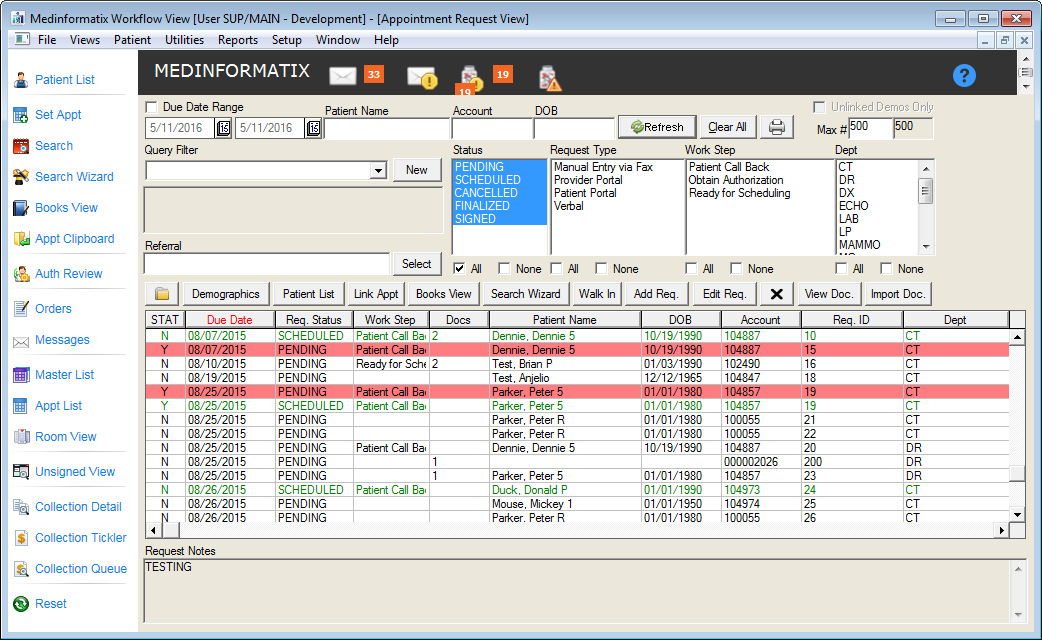
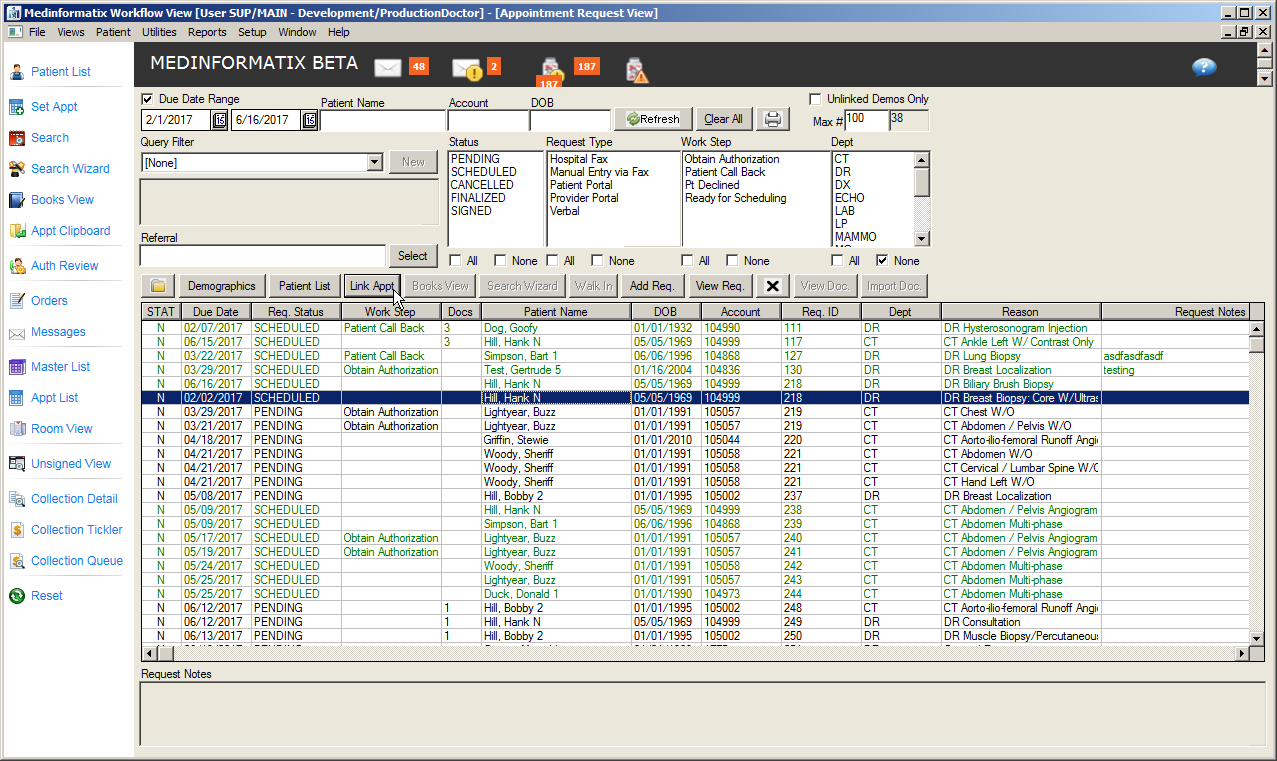
The Appointment Request View screen allows the user to view all the incoming requested appointments and search for specific appointment requests on the basis of Date Range, Status, Request Type, Patient Name, Account Number and Date of Birth. Clicking an appointment from the list allows the user to access the patient information buttons such as Chart, Demographics and Patient List and allows the user to manage the incoming orders and schedule them from one screen.
Click the Appt Requests link on the Workflow view screen to open the Appointment Request View screen.
For users who don’t have the Appt Request tab configured for their screen, the Appointment Request View screen can be accessed by clicking the Views tab at the top of the screen and selecting Appointment Request View from the dropdown list.
Select the desired scheduled date range by using the calendar icons next to the Date Range fields.
Click the Due Date Range checkbox to list the appointment by due dates.
Enter the patient’s name in the Patient Name field if desired.
Enter the account number in the Account field.
Enter the date of birth in the DOB field.
Click the Refresh button to load the screen with the list of search results.
Click the Clear All button to clear the search fields.
Click the Printer button for a list formatted for a printer.
Enter the number of orders to be viewed at one time into the Max # field.
Use the Query Filter dropdown list to select a pre-defined search criteria to serve as a “pre-filter” before other criteria are selected.
Click the Select button in Referral field to choose a referring provider.
Select the Status of the appointment from the list. Appointments can be PENDING, SCHEDULED, CANCELLED, FINALIZED or SIGNED. The user can click either the All or None checkboxes to limit the search.
Select the Request Type from the list. The user can click either the All or None checkboxes to limit the search.
Select the Work Step from the list. The user can click either the All or None checkboxes to limit the search.
Select the department from the Dept list. The user can click either the All or None checkboxes to limit the search.
Click the desired appointment to activate the Chart and Patient List buttons and the Link Appt and Books View buttons. If documents attached to the request are included, the View Doc. and Import Doc. buttons will be activated. Documents can be attached from the Appointment Request Details screen.
Click the Demographics button to view the demographic and insurance information for the patient. This screen will autopopulate when creating a new account for an unlinked request.
Click the Walk In button to schedule a walk-in appointment.
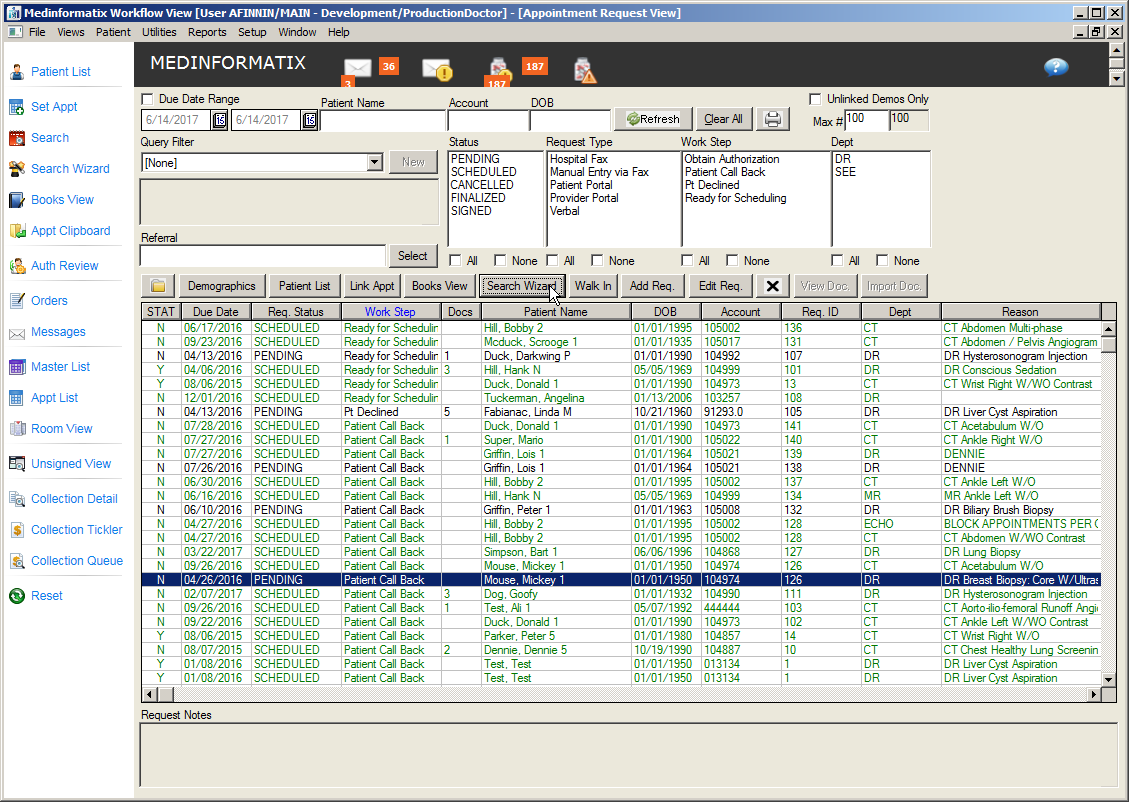
Click the Search Wizard button to combine the scheduling with the saved search.
When the search is completed, the results will be listed on the screen. Click the column heading to sort by that parameter (e.g. Due Date).
The explanations for the color coding is listed in the table below.
Color |
Explanation |
Black |
Appointments that are PENDING. |
Red |
Appointments that have been CANCELLED. |
Green |
Appointments that have been SCHEDULED. |
| Hightlighted in Red | Appointments that have been flagged as STAT or urgent. |
 When scheduling through the ARV,
Booking messages for Search Wizard and Books View are displayed.
When scheduling through the ARV,
Booking messages for Search Wizard and Books View are displayed.
Appointment Request Details
Details of the appointment request can be edited through the Appointment Request Details screen. This screen can also be used to request a new appointment. Additional information can also be requested from this screen.
Click the desired patient appointment from the list.
- Click the Edit Req button. The Appointment Request Details screen for the selected appointment will open.
- Edit any of the information in the fields on the Appointment Request Details screen.
- Click the Save button or the Cancel button to return to the Appointment Request View screen.
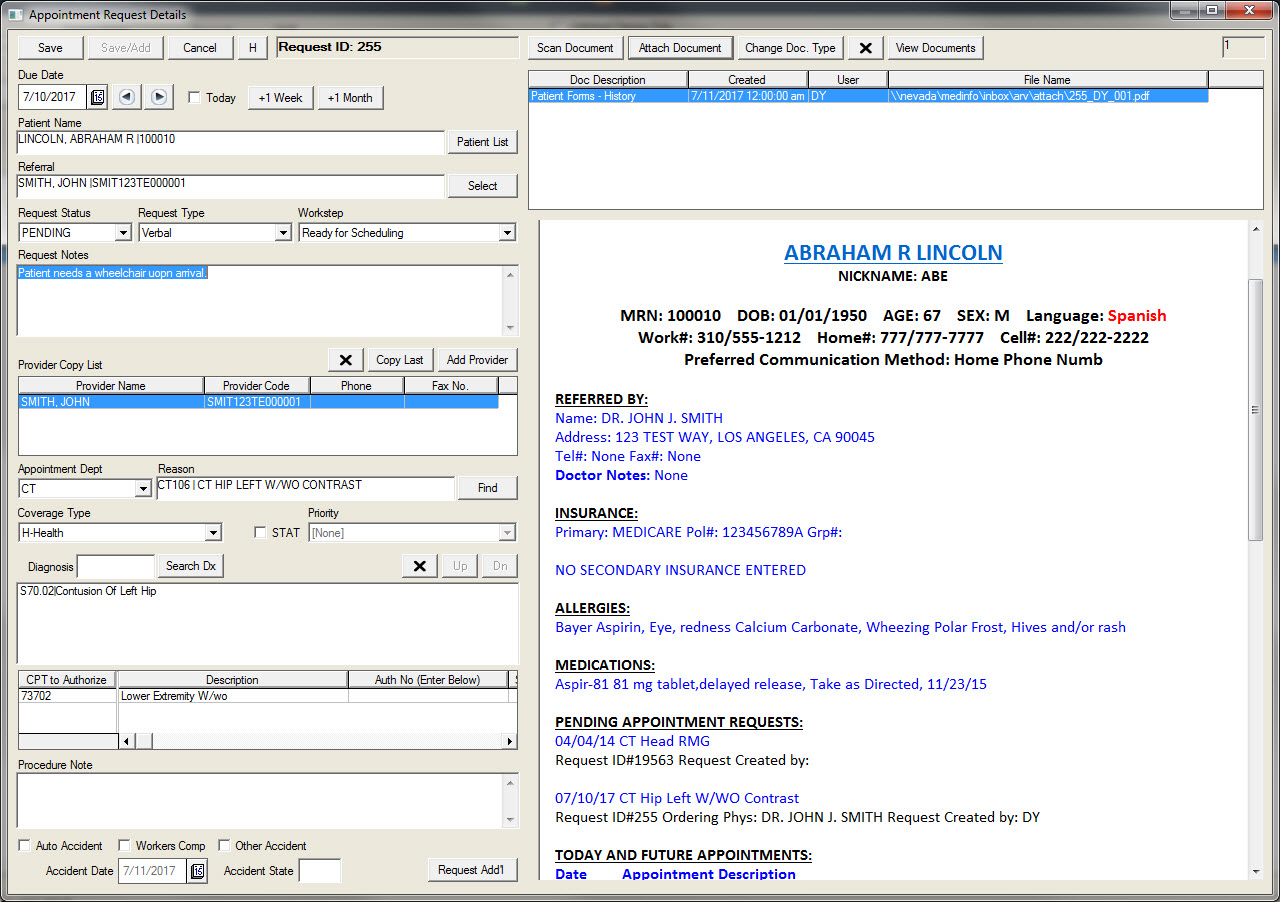
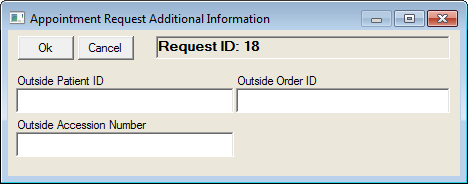
- Click the Request Add'l button to open the Appointment Request Additional Information screen.
- Enter the desired information and click the Ok button.
To open a new Appointment Details screen, click the Add Req. button on the Appointment Request View screen. A blank screen will open regardless of whether a patient record is highlighted.
Enter the desired information in the fields.
Click the Save button to save the information and return to the Appointment Request View screen. It is also possible to click the Save-Add button to save the current entry and reset the window so that a second record can be added. Clicking the Cancel button will exit the screen without saving any changes.
Scheduling Appointments using the Search Wizard
Appointments can be scheduled from the Appointment Request View screen when an request is created that requires an appointment with the correct exam(s) linked to it. Each linked exam must be scheduled.
Click the desired patient appointment from the list.
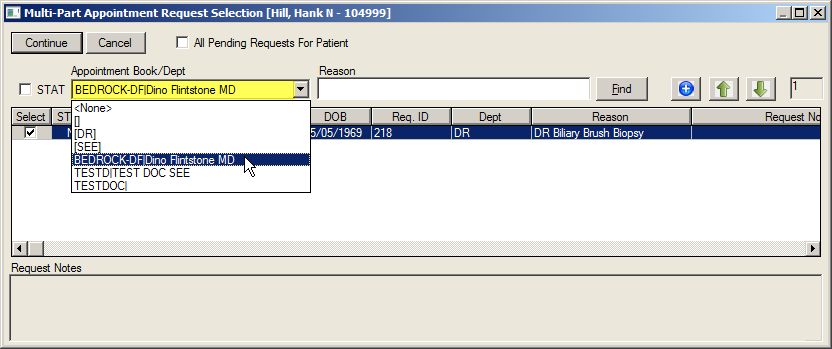
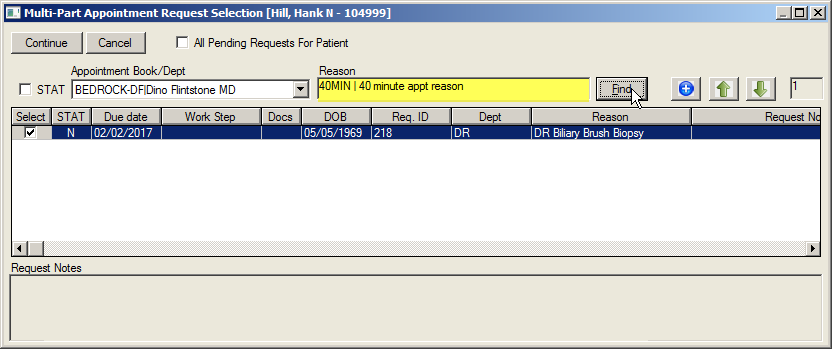
Click the Search Wizard button. The Multi-Part Appointment Request Selection (MPARS) screen for the selected appointment will open.
Select the Appointment Book/Dept and the Reason for the appointment from the dropdown menu.
If there are multiple exams, click the check-boxes to select and deselect the exams that are being scheduled.
The user can also use the green up and down arrows in the right corner of the screen to change the sequence of the exams that are being scheduled.
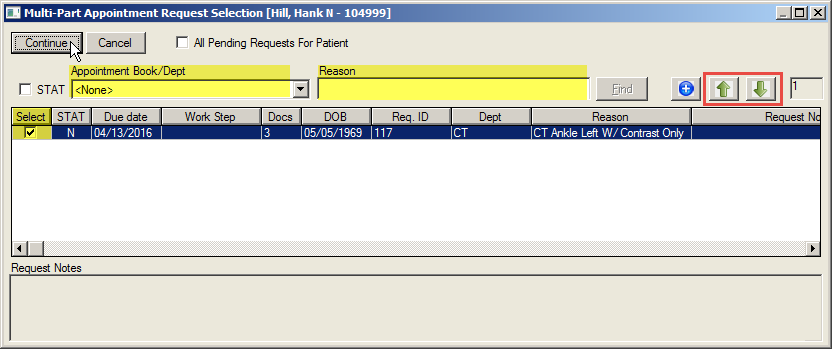
Click the Continue button on the MARS screen to open the Search Wizard function. The patient name, referral and exams fields will be populated.
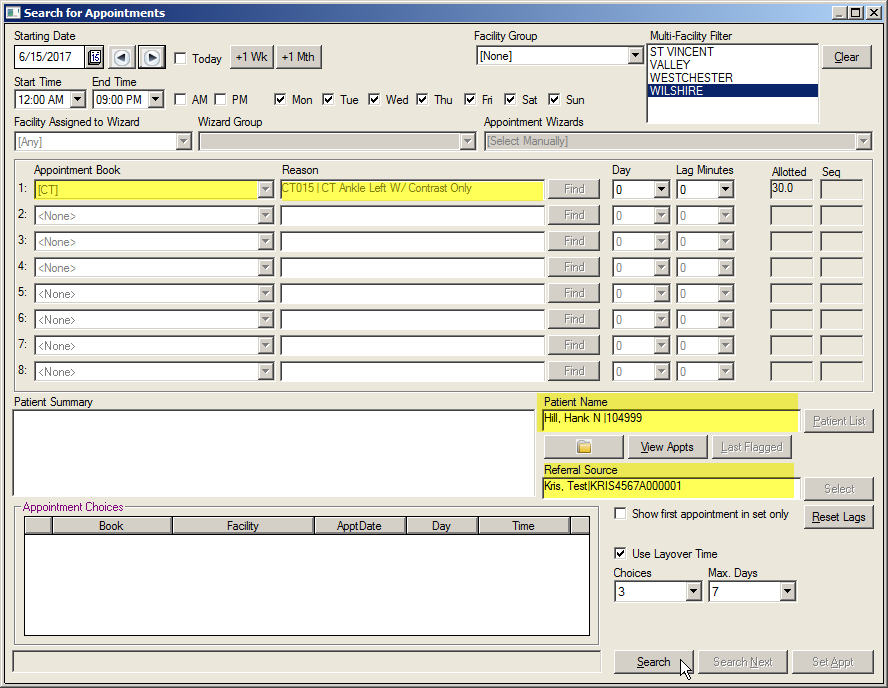
Click the date and facilities to search then click the Search button. The results will appear in the first available time slots.
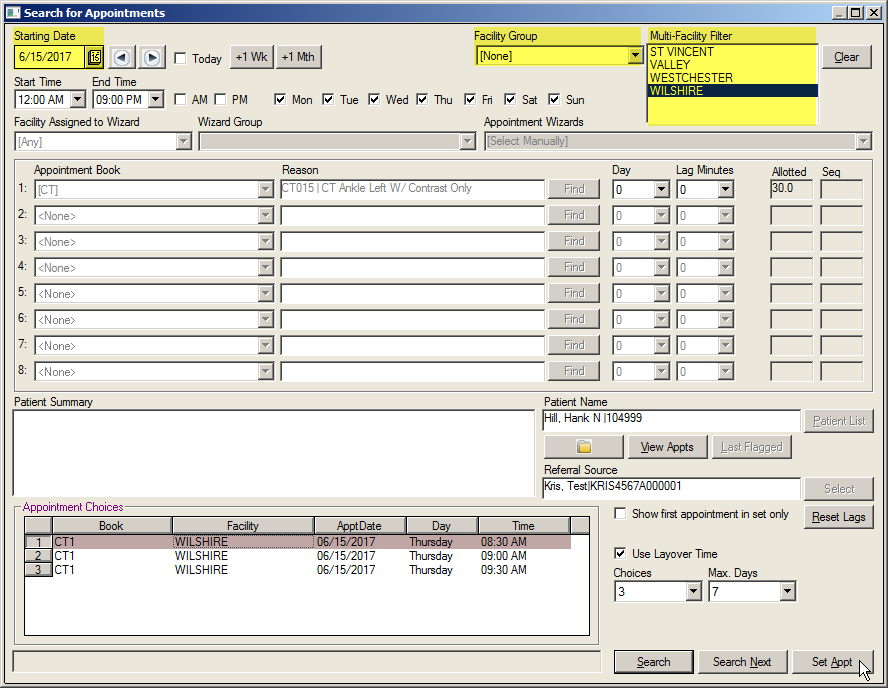
Select the desired appointment and click the Set Appt button. The Confirm Appointment Screen will open.

Verify the information with the patient and add any desired notes in the Appointment Notes field.
Click OK to confirm the appointment.
The order in the ARV screen will changed to SCHEDULED and the patient chart will open.
Scheduling Appointments and Add Placeholder
The scheduler will also set appointments from the ARV and add a placeholder. A placeholder is an exam that does not have an order but must be scheduled at the same time as the ordered exam.
Click the desired patient appointment from the list.
Click the Search Wizard button. The Multi-Part Appointment Request Selection (MPARS) screen for the selected appointment will open.
Select the Appointment Book/Dept and the Reason for the appointment from the dropdown menu.
Click the Find button and select the reason from the Appointment Reason Selection screen.
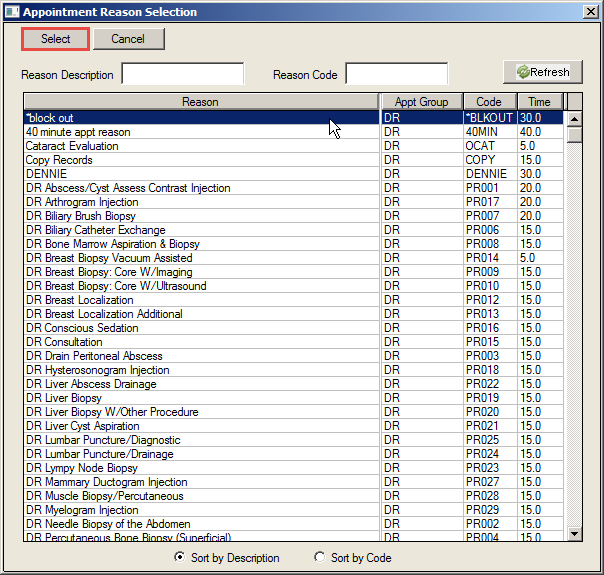
Highlight the reason and click the Select button.
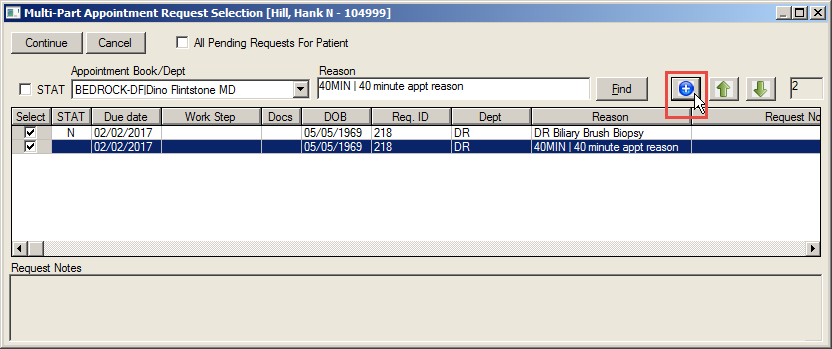
Click the blue
 button to add the placeholder to the list.
If there are multiple exams, click the check boxes to select and deselect the exams that are being scheduled.
Click the Continue button to open the Search Wizard. The patient name, referral and exams, including the placeholder will be populated.
Click the date and facilities to search then click the Search button.
Schedule the appointment using the Search Wizard. See above procedure.
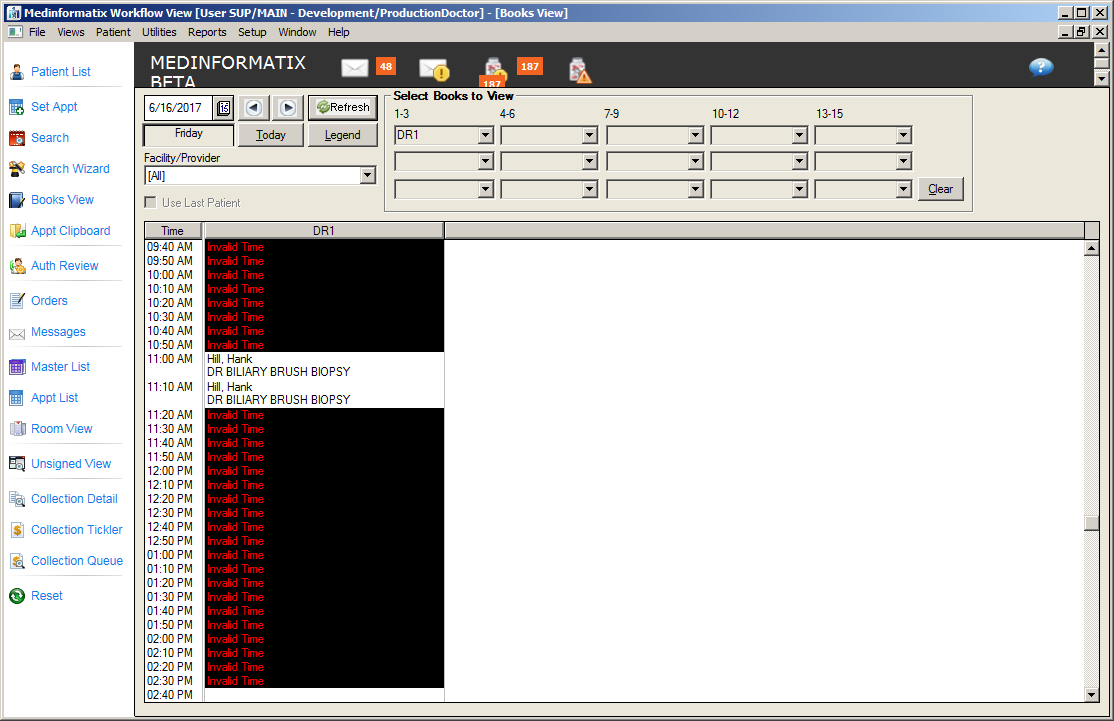
Scheduling Appointments in Books View
It is also possible to schedule appointments from the ARV using the Books View screen.
Click the desired patient appointment from the list.
Click the Books View button.
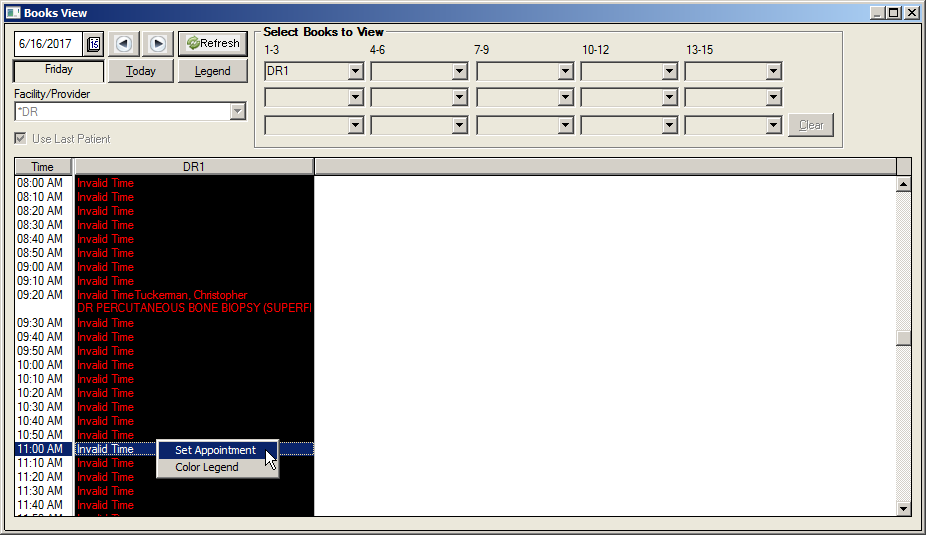
In the Select Books to View section of the screen, use the dropdowns to select the books you wish to appear in the screen.
Select a suitable time slot and right-click in the book at the appropriate time.
Click the Set Appointment option.
This will automatically open the Confirmation screen.
Verify the information with the patient and add any notes in the appointment notes field.
Click the OK button.

The appointment will be set and the status of the order will turn to SCHEDULED in the ARV.
Link an Order to an Existing Appointment
With the Appointment Request View screen, the user is able to link a request to a previously scheduled appointment. If the patient calls in to make an appointment before the request has been entered into the system, the user can link the request later.
- Highlight the desired appointment in the ARV screen.
- Click the Link Appt button. The Link Appointment window will open which display all appointments that match the reason from the requested request.
- Click the appropriate appointment so that it is highlighted.
- Click the Select button to link the appointment with the request.
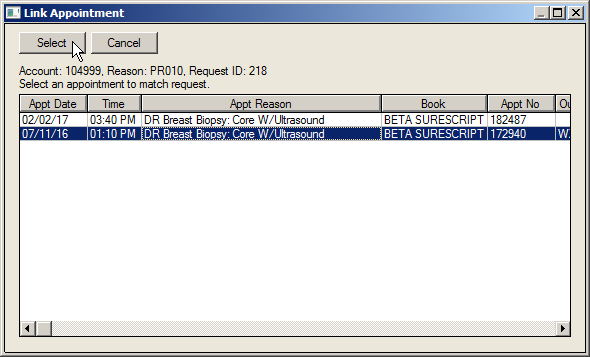
- Return to the ARV screen. The request will be displayed as SCHEDULED.