Billing Setup Tables
The Billing Setup tables are used to customize and define the functions of the billing areas provided in the MedInformatix system. These areas include and/or are linked to fee schedules, charge entry, payment entry, and a variety of collection options, among others.
At the Main Menu screen, click on the Preferences option in the upper toolbar.
Click the Setup Billing Tables option from the dropdown menu.
Click on the setup table name to display the selected setup tables screen.
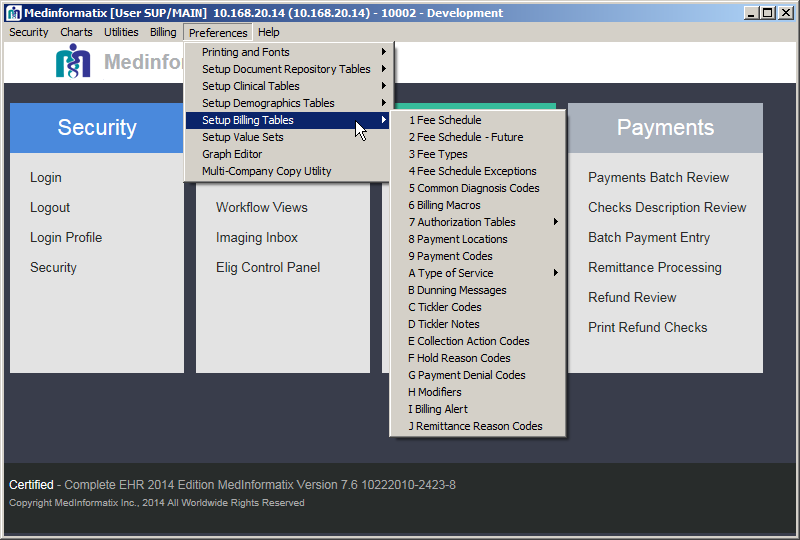
 Click on the desired link in the following
list to go
Click on the desired link in the following
list to go
directly to the description of that setup table.
Fee Schedule
The Fee Schedule table allows practices to define a listing of service codes and services that are rendered for patients so that they can be associated with charge amounts. The codes defined in the fee schedules are then available for the billing and charge entry processes and are displayed on the Billing Profiles, Authorization Record, Delayed Billing, Charge Entry, Payment Entry, Edit Charge, Day Sheet, Charge Review, Claims Processing, Payments Batch Review, and Batch Payment Processing screens within the system. Adding to the fee schedule also makes the CPT code available to the Appointment Reason Set-up Table in the Billing Profile.
Adding to the table involves adding a CPT to the Fee Schedule and creating a new Fee Type. Once the Fee Schedule table is opened, the CPT is added through the Add/Modify Fee section located at the bottom of the screen. There is also an Inactive field on the screen that allows the administrator to inactivate a code, which makes it inaccessible for users. The inactivated code(s) will be displayed with peach shading so that it can be easily identified as inactive.
The ability to copy an existing fee schedule to a new one and to establish a future fee schedule for new rates also exists and is outlined in this section. The tables of information that are provided may help in determining what information is added.
- Select 1 Fee Schedule from the Billing Tables list under Preferences on the Main Menu screen, which opens the Fee Schedule screen.
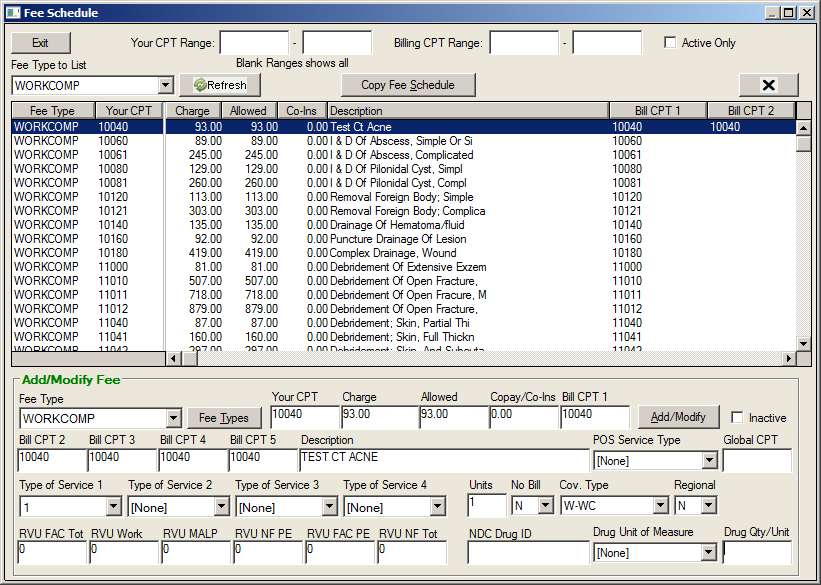
Move to the Add/Modify Fee section of the screen.
Using the Fee Type dropdown, select a Fee Type.
Note: Clicking the Fee Types button opens the Fee Type Table. A new fee type can be entered into the New Entry field which will appear in the Fee Type dropdown list.
Enter the appropriate code in the Your CPT field.
Note: This can be an office-defined code or an actual CPT code. If using an office-defined code, the actual CPT code must be entered in the Bill CPT 1 field.
Enter the appropriate information in the Charge, Allowed, and Copay/Co-Ins fields.
Note: If not entering an Insurance Allowed amount in the Allowed field, enter the Charge amount in this field.
Enter the actual billing CPT in the Bill CPT 1 field.
Enter any alternate Bill CPT codes where applicable in the Bill CPT 2-5 fields.
Enter a description of the CPT code in the Description field.
Using the Type of Service 1 dropdown, select the CMS Type of Service Code for this CPT.
Using the dropdown list, select any other applicable codes in the Type of Service 2-4 fields.
Note: TOS 2 and 4 fields are used for reporting purposes.
At the RVU fields, enter the Relative Value Unit percentages for the procedure, if known, otherwise leave blank.
At the Units field, enter the number of times this service is performed as a default.
At the No Bill field, use the dropdown to select either N if the CPT is to be billed on a claim or Y if the CPT is not to be billed on a claim.
At the Coverage field, select the default entry.
At the Regional field, select the default entry.
Enter the NDC Drug ID in the NDC Drug ID field, if applicable.
Enter the type of unit in the Drug Units field, if applicable.
Click on Add/Modify to add the information to the Fee Schedule table, which is displayed above the Add/Modify Fee section.
Field: |
Descriptions: |
|||
Fee Type |
Select the fee schedule that will be used for charges entered. |
|||
Your CPT |
Enter the code that the practice uses when entering charges. This may be the actual CPT code, but can be different as, for example, when entering one drug (i.e. Rocephen) with a variety of drug amounts. Rocephen 250mg and 500mg may each have the same Bill CPT but different Your CPT codes; charge amounts; unit amounts and NDC ID codes. Your CPT does not print on the claim form. |
|||
Charge |
Enter the dollar amount charged for the service. This information does print on the claim form. (If capitated plans are used, enter 0.00 in this field, and then enter the amount required in the Allowed field, which will print on the claim form.) |
|||
Allowed |
Enter the dollar amount the payor is expected to pay, which is found in the payor’s published fee schedule. If the amount is not known, enter the Charge amount in this field. |
|||
Copay/Co-Ins |
Any co-pay amount established for the charge is entered here. The charge item will display this amount in the Patient Due field. Because copay amounts vary greatly by insurance plan, this should generally be set to 0.00. |
|||
Bill CPT 1 |
Enter the CPT code to be printed on the claim form. This field allows 15 characters and can include modifier codes added to the end of the CPT code. |
|||
Bill CPT 2-5 |
Enter any alternate CPT codes in these fields. If a carrier requires a CPT for a particular procedure, enter in one of these fields. At the Insurance Carrier Table, you will need to set the CPT to use to the CPT field to that field. |
|||
Description |
Enter the description of the CPT code in this field. |
|||
Type of Service 1 |
Use the dropdown arrow to select the CMS type of service code for the selected CPT. (See Type of Service table) |
|||
Type of Service 2 |
This field is reserved for local use/reporting purposed. |
|||
Type of Service 3 |
Use the dropdown arrow to select the co-pay Type of Service |
|||
Type of Service 4 |
This field is reserved for local use/reporting purposes. |
|||
Units |
Enter the amount of units used for the procedure. |
|||
No Bill |
This field defaults to “N”, which allows the item to be billed on a claim. If it is not to be billed on a claim, select “Y”. |
|||
Cov. |
Indicates the CPT code Coverage Type. This field is linked to the Demographics Insurance screen and the Coverage Type field. Leave this set to the default of “-“. |
|||
Region |
This field identifies Regional Fee Adjustments. Leave this set to the default of “N”. |
|||
Inactive |
Prevents code from being used in billing a new charge. Appears in fee schedule with peach background. |
|||
RVU |
If appropriate, enter the Relative Value Units for this CPT. These fields are for reporting purposes only and will allow a maximum of 2 decimal places (see relative value section). |
|||
NDC Drug ID |
If appropriate, enter the National Drug Code for this CPT. |
|||
Drug Unit of Measure |
This dropdown field enables users to select one of the standard entries for the CPT: F2 - International Unit GR – Gram ML – Milliliter UN – Unit |
|||
Drug Qty/Unit |
Enter the drug quantity per unit. |
|||
Type of Service Coders |
|
Code: |
Place of Service: |
01 |
Medical Care and Injections |
02 |
Surgery and Maternity |
03 |
Consultation |
04 |
Diagnostic X-Ray – Total Component |
05 |
Diagnostic Laboratory – Total Component |
06 |
Radiation Therapy |
07 |
Anesthesia |
08 |
Surgical Assistance |
09 |
Other Medical (such as prosthetic devices, orthotic or medical supplies, ambulance services, etc.) |
10 |
Blood Charges |
11 |
Used DME |
12 |
DME (Purchase) |
13 |
ASC Facility |
14 |
Renal Supplies in the Home |
15 |
Alternate Method Dialysis Payment |
16 |
CRD Equipment |
17 |
Pre-Admission Testing |
18 |
DME (Rental) |
19 |
Pneumonia Vaccine |
20 |
Second Surgical Opinion |
21 |
Third Surgical Opinion |
99 |
Other (e.g., used for prescription drugs) |
A |
Used DME |
M |
Alternate Payment for Maintenance Dialysis |
Y |
Second Opinion on Elective Surgery |
Z |
Third Opinion on elective Surgery |
Fee Schedule - Future
The Fee Schedule – Future table provides sites with the ability to create a fee schedule that will be initiated at a specific date by MedInformatix Technical Support and defined by the System Administrator. Contact the system administrator or reseller for technical assistance with this table.
Fee Types
The Fee Types table enables users to create Fee Type Codes, which are used to define and name different fee schedules. Fee Type Codes are assigned to patients when insurance carriers are attached to their demographic files and define what charge levels will be in effect for services provided for them. Additionally, the Fee Type table screen can be accessed by clicking on Fee Types in the Fee Schedule screen. Aside from the Demographics screen, the Fee Type can also be seen in the Edit Charge, Day Sheet, Charge Review, Claims Processing, and Payments Batch Review screens.
- Select 3 Fee Types from the Billing Tables list under Preferences on the Main Menu screen, which opens the Fee Type Table screen
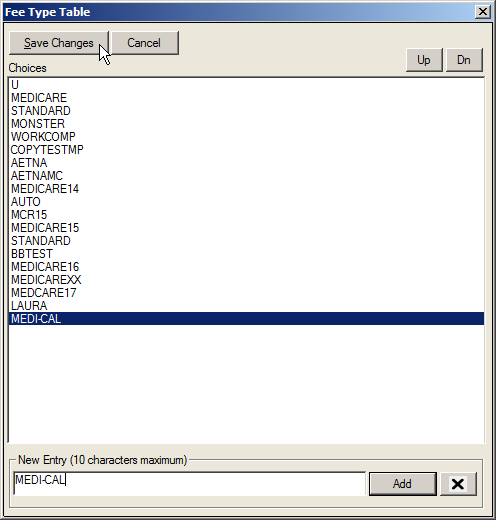
- Enter the appropriate fee type in the New Entry field.
- Click the Add button.
Note: There is a limit of 10 characters in this field.
- Click the Save Changes button to save the information and exit the screen.
Fee Schedule Exceptions
Select 4 Fee Schedule Exceptions from the Billing Tables list under Preferences on the Main Menu screen, which opens the Fee Schedule Exception rule screen.
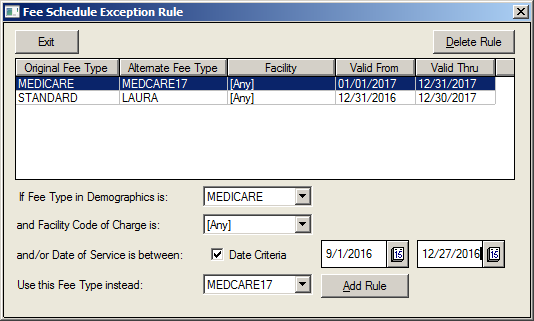
Using the dropdown, choose the appropriate Fee Type in Demographics.
Using the dropdown, choose the appropriate Facility Code of Charge.
Select the Date Criteria selection box.
Select the date range using the calendars.
Using the last dropdown, select the Alternate Fee Type.
Click on the Add Rule button to create the new exception.
Click on the Exit button to close the screen.
Common Diagnosis Codes
The Diagnosis Codes table contains the ICD10 diagnosis codes for the common list of problems. Codes entered here are the most common codes used in the medical practice. It is important to note that codes in this list cannot be edited. If a code must be changed, it must first be deleted from the list and then added back in correctly.
The Common Diagnosis Code table is one of the few clinical tables that is also used in the billing portion of the system. This short list of diagnosis codes is accessible from the Delayed Billing screen, Finalize Appointment screen, Add/Edit Authorization screen, Enter Charge screen, and Problem List screen
- Select 5 Common Diagnosis Codes from the Setup Billing Tables list under Preferences on the Main Menu.
- Enter a diagnosis description and ICD10 code in the New Entry field in the Description|Code format.
- Click on the Add button to list the entered information in the Choices field..
- When finished, click on the Save Changes button.
Billing Macros
The Billing Macros table enables users to create entries that can be utilized in the Billing Macros feature of the software. Often, a single procedure is ordered that actually includes several billable services or steps to complete. For instance, administering a medication may include a fee for the injection and a fee for the drug administered. The Billing Macros feature allows each of the items to be billed while choosing a single billing property on the Decision Tree. It is important to enter items in the following format:
[MACRO NAME]
1=PROCEDURE | DIAGNOSIS | CPT | UNITS | FACILITY | REM
2=PROCEDURE | DIAGNOSIS | CPT | UNITS | FACILITY | REM
- Select 6 Billing Macros from the Billing Tables list under Preferences on the Main Menu screen
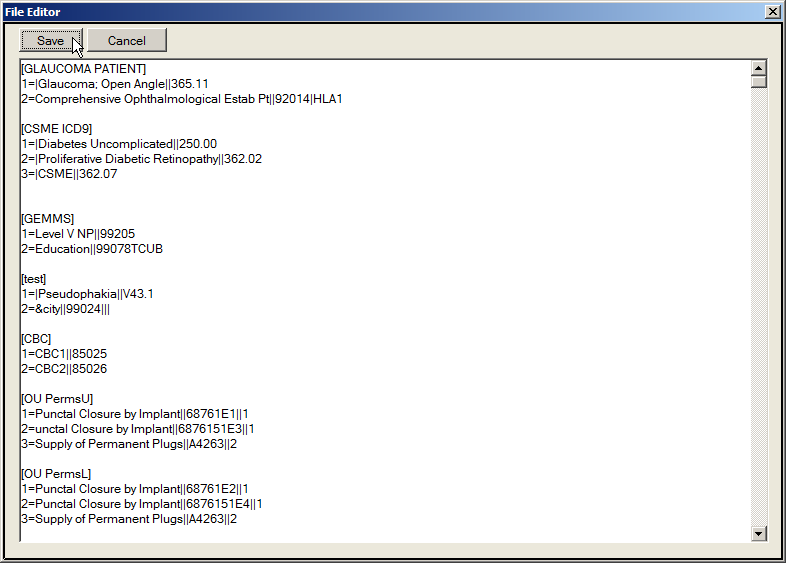
Move to the bottom of the document and type the new information onto the screen in the exact format of the other entries as given above.
Once completed, click on the Save button.
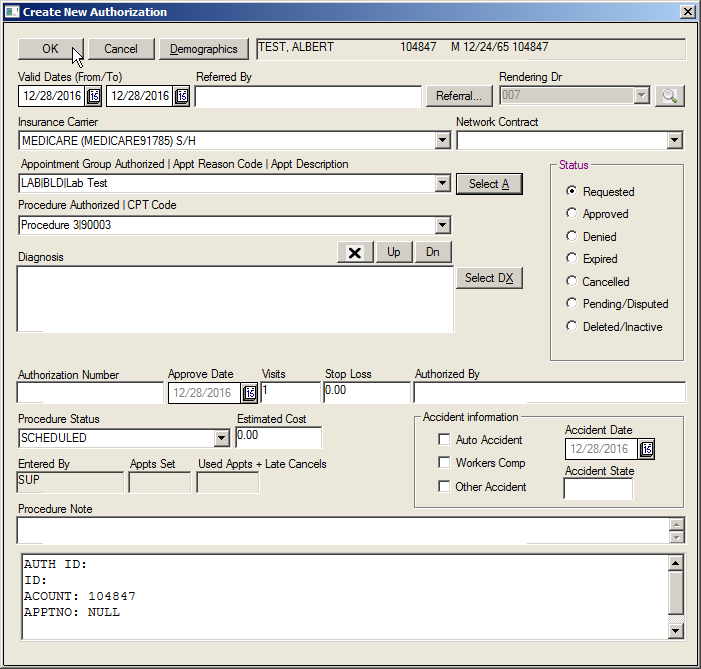
Authorization Tables
The Authorization Tables enable users to create entries for many of the fields in the Add/Edit Authorization screen. There are four different Authorization Tables that are outlined in the following sections. Users are also able to click on button options for Appointments and Diagnosis that allow for a selection from the Appointment Reason table and Diagnosis code tables.
Authorized Appointments
The Authorized Appointments table contains a list of appointment reasons that may require authorization prior to the appointment being completed. This information is available for selection from the Authorized Appointment dropdown in the Add/Edit Authorization screen.
Select 7 Authorization Tables from the Billing Tables list under Preferences on the Main Menu screen.
Click on Authorized Appointments from the submenu.
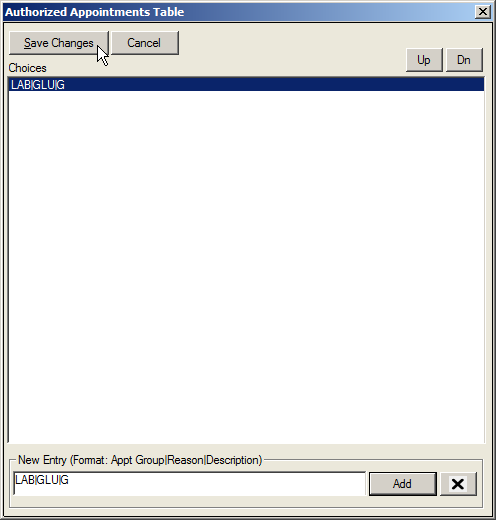
- At the New Entry field, enter the information needed for an authorization.
Note: The information must be entered in the following format: APPT GROUP|REASON|DESCRIPTION. There is a 10-character limit.
- Click on the Add button.
- Click on the Save Changes button to exit the screen.
Authorized Procedures
The Authorized Procedures table contains a list of procedures that may require authorization prior to performing them. This information is available for selection from the Authorized Procedure field dropdown list when an authorization for a patient is created.
Select 7 Authorization Tables from the Billing Tables list under Preferences on the Main Menu.
Click on Authorized Procedures from the submenu.
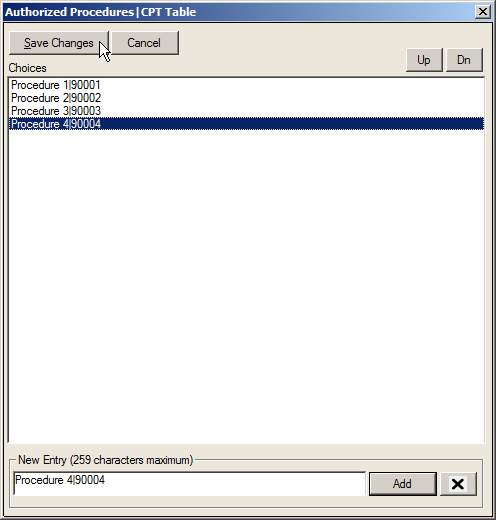
- At the New Entry field, enter the information needed for the authorization.
Note: The information must be entered in the following format: PROCEDURE|CPT CODE. Entries must be no more than 259 characters long.
- Click on the Add button.
- Click on the Save Changes button to exit the screen.
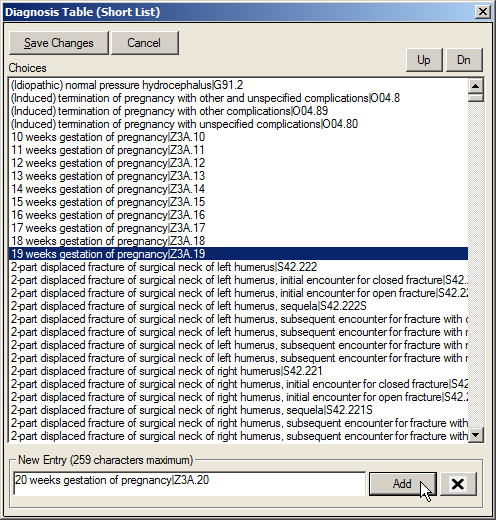
Authorized Diagnosis
The Authorized Diagnosis table contains a list of diagnosis codes that may require authorization prior to being performed. Information added into this table is displayed in the Diagnosis Authorized dropdown on the Add/Edit Authorization screen.
Select 7 Authorization Tables from the Billing Tables list under Preferences on the Main Menu.
Click on Authorized Diagnosis from the submenu.
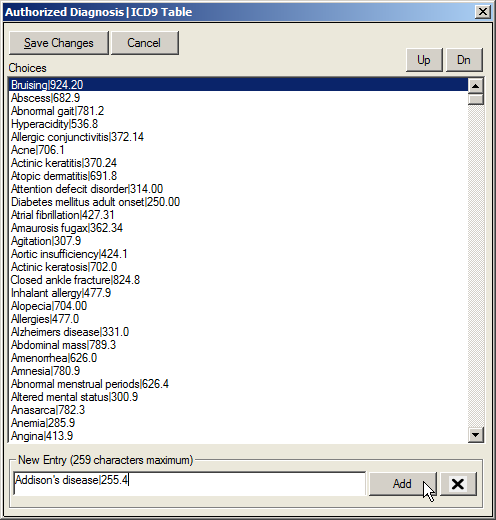
- At the New Entry field, enter the information needed for the authorization.
Note: The information must be entered in the following format: DIAGNOSIS|ICD9 CODE. Entry must be no more than 256 characters.
- Click on the Add button
Authorization Procedure Status
The Authorized Procedure Status table is used to update the status of procedures requiring authorization. Entries in this table will display in the Procedure Status dropdown on the Add/Edit Authorization screen and enable users to indicate the status of the scheduled procedure. For example, a site may decide to enter in COMPLETED and PENDING in this table.
- Select 7 Authorization Tables from the Billing Tables list under Preferences on the Main Menu.
- Click on Authorized Procedure Status from the submenu.

At the New Entry field, enter the information needed for the authorization. Entry must be no more than 256 characters.
Click on the Add button.
Click on the Save Changes button to exit the screen.
Payment Locations
Select 8 Payment Locations from the Billing Tables list under Preferences on the Main Menu.
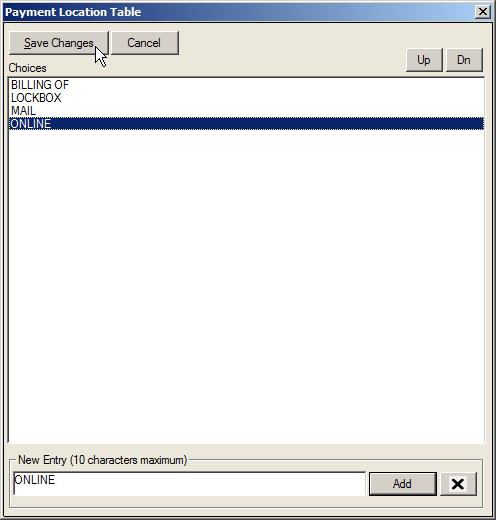
- At the New Entry field, enter the Payment Location.
- Click on the Add button.
Note: This field has a limit of 10 characters.
- Once all items are created, click on the Save Changes button to exit the screen.
Payment Codes
The Payment Codes table is used to establish a list of credit and debit codes to be applied to a claim or an account. The codes are used to record charge and payment adjustments and write-offs in the Payment Entry screen. This information is also available for financial reporting.
When creating an Adjustment Code, the selected code must begin with the letter A and is limited to 5 characters. Adjustments are split into two types: a Charge Adjustments (Adj/Charge) and a Payment Adjustments (Adj/Credit). Payment Adjustments are typically used for items that would directly affect a bank account, such as returned checks or refunds. All other adjustments should be categorized as Charge Adjustments.
When creating a Write-off Code, begin with the letter W and limit the code to 5 characters. The description field only allows 30 characters. Consequently, the entire description is not able to be viewed on the Payment screen. It is recommended that descriptions are kept as brief as possible.
- Select 9 Payment Codes from the Billing Tables list under Preferences on the Main Menu.
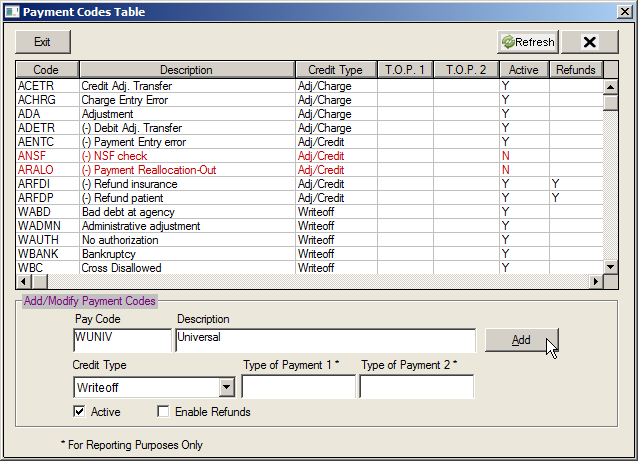
- Move to the Add/Modify Payment Codes section of the screen and enter a 5 character Payment Code in the Pay Code field.
- At the Description field, enter a description for the code.
Note: This field has a limit of 30 characters.
- Using the Credit Type dropdown, select a credit type.
Note: This can be either an Adj/Charge, an Adj/Credit, or a Write-off.
- If appropriate, enter pay codes for reporting purposes in the Type of Payment 1 and 2 fields.
- Click on the Add button.
- To display the new item in the list, click on the Refresh button.
- Once all items are created, click on the Exit button to close the screen.
Type of Service
Selecting Type of Service from the Billing Tables option under Preferences on the Main Menu reveals four different Type of Service Code tables. It is important to note that CMS dropped the use of Type of Service codes for Medicare in 1992; however, many commercial insurance carriers have retained the use of TOS codes and require their presence on claims.

Type of Service 1 Codes
Type of Service 1 Codes are used to enter the Type of Service required in Box 24 of a CMS 1500 form. A TOS 1 is selected for a CPT Code in the Fee Schedule when required by a carrier.
Type of Service 2&4 Codes
Type of Service 2 & 4 Codes are used as alternate Type of Service codes and is required to be present only in Box 24C of a CMS 1500 form. They are also used for specific procedure reporting requirements. For example, creating a list of modalities in the TOS 4 Codes table allows administrators to assign the modality used to each CPT in the fee schedule and then report on CPT by Modality. TOS 2 & 4 codes may be selected when entering or modifying a CPT Code in the Fee Schedule.
Type of Service 3 Codes
Type of Service 3 Codes are used to enter the Copay Type of Service. In addition to being available for selection in the Fee Schedule, this table also populates the TOS 3 field on the Plan Profile (Copay) screen on the Insurance Carrier screen.
- Select A Type of Service Codes from the Billing Tables list under Preferences on the Main Menu.
Select the desired Type of Service Table (1, 2, 3, or 4) from the submenu.
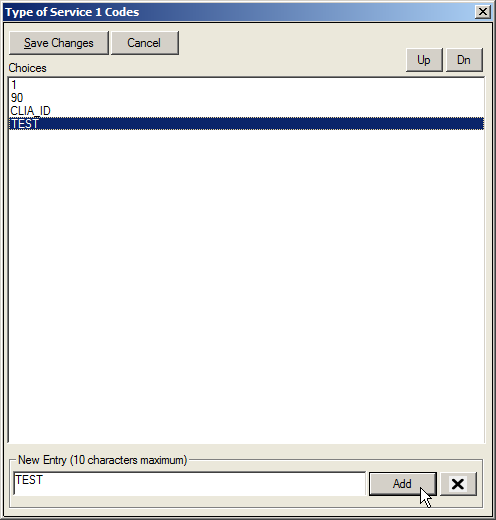
- At the New Entry field, enter the new code.
Note: There is a limit of 10 characters in this field.
- Click on the Add button to update the table.
- Once all codes are added, click on the Save Changes button to save the information and exit the screen.
Type of Service Coders |
|
Code: |
Place of Service: |
01 |
Medical Care and Injections |
02 |
Surgery and Maternity |
03 |
Consultation |
04 |
Diagnostic X-Ray – Total Component |
05 |
Diagnostic Laboratory – Total Component |
06 |
Radiation Therapy |
07 |
Anesthesia |
08 |
Surgical Assistance |
09 |
Other Medical (such as prosthetic devices, orthotic supplies, medical supplies, ambulance services) |
10 |
Blood Charges |
11 |
Used DME |
12 |
DME (Purchase) |
13 |
ASC Facility |
14 |
Renal Supplies in the Home |
15 |
Alternate Method Dialysis Payment |
16 |
CRD Equipment |
17 |
Pre-Admission Testing |
18 |
DME (Rental) |
19 |
Pneumonia Vaccine |
20 |
Second Surgical Opinion |
21 |
Third Surgical Opinion |
99 |
Other (e.g., used for prescription drugs) |
A |
Used DME |
M |
Alternate Payment for Maintenance Dialysis |
Y |
Second Opinion on Elective Surgery |
Z |
Third Opinion on elective Surgery |
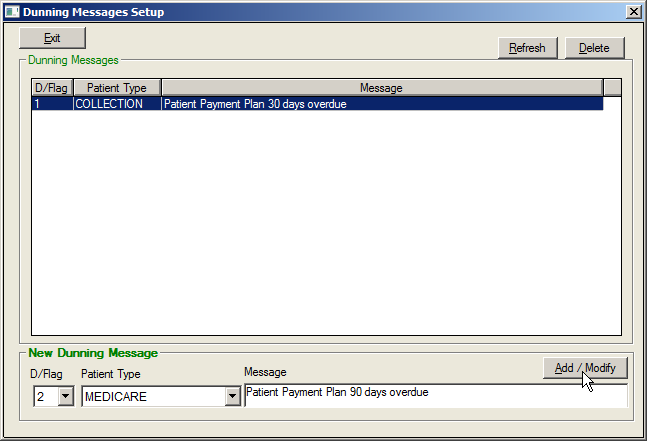
Dunning Messages
The Dunning Message table is used to set up Dunning Messages that will appear on patient statements based on the demographic delinquency level and patient type on a patient’s demographic file. Delinquency Flags are automatically calculated on a daily basis by the system, with the exception of Delinquency Flags D - Z, which are user defined. It is important to note that the Message field in the Dunning Message Table has a limit of 60 characters.
Delinquency Flags |
|
Delinquency is calculated by the system automatically based on the oldest open Patient Balance on the account. Aging is calculated based on the Patient Responsibility Date of the charge line item. |
|
0 |
Patient Balance aged 0-29 days |
1 |
Patient Balance aged 30 – 59 days |
2 |
Patient Balance aged 60 – 89 days |
3 |
Patient Balance aged 90 – 119 days |
4 |
Patient Balance aged 120 – 149 days |
5 |
Patient Balance aged 150 – 179 days |
6 |
Patient Balance aged 180 – 209 days |
7 |
Patient Balance aged 210 – 239 days |
8 |
Patient Balance aged 240 – 269 days |
9 |
Patient Balance aged 270 – 299 days |
A |
Patient Balance aged 300 – 329 days |
B |
Patient Balance aged 330 – 359 days |
C |
Patient Balance aged 360+ days |
D – Z* |
Custom delinquency levels assigned by the user. These are not automatically updated by the system. |
To Add A New Dunning Message
- Select B Dunning Messages from the Billing Tables list under Preferences on the Main Menu.
- Using the D/Flag dropdown, select a delinquency flag.
- Using the Patient Type dropdown, select the appropriate patient type.
- Enter the appropriate dunning message in the Message field.
- Click on the Add/Modify button.
Note: Message field has a limit of 60 characters.
- Once the list is complete, click on the Exit button to close the screen.
Note: When entering the same message for several Patient Types, highlight the message before clicking on Add/Modify and copy it using the CTRL and C keys. Once the next Patient Type is selected, use the CTRL and V keys to paste the message in the message field.
Tickler Codes
The Collection Tickler Codes table is utilized to create Collection Tickler Codes, which are assigned to the Follow-up Tickler area of the collection options available in MedInformatix. The codes are linked to the Collection Tickler options located through the Collection Views.
- Select C Collection Tickler Codes from the Billing Tables list under Preferences on the Main Menu.
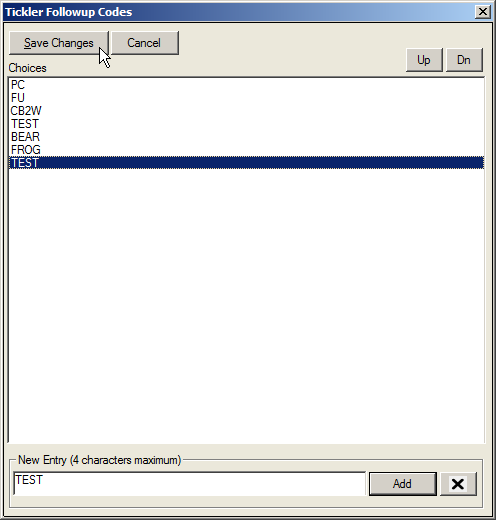
- At the New Entry field on the Tickler Follow Up Codes screen, enter a tickler code.
- Click on the Add button.
Note: This field has a 4-character limit.
- Once the list has been completed, click on the Save Changes button to close the screen.
Tickler Notes
The Collection Tickler Notes table allows users to quickly assign a note to a Follow-up Tickler in the Collection Views. The notes are created and stored in the setup table and are linked to the Collection Tickler screens. When a note is needed, it can be selected using the appropriate dropdown on the Collection Tickler screen.
- Select D Collection Tickler Notes from the Billing Tables list under Preferences on the Main Menu.
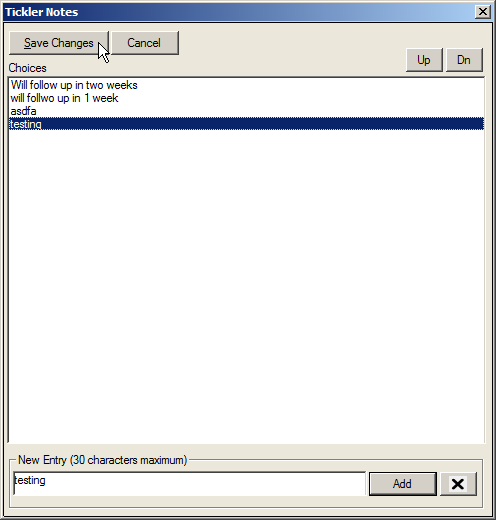
At the New Entry field on the Tickler Notes screen, enter a tickler note.
- Click on the Add button.
Note: This field has a limit of 30 characters.
- Once the list has been completed, click on the Save Changes button to close the screen
Collection Action Codes
The Collection Queue Action Codes table allows users to create a list of collection queue action codes that can be assigned and reviewed in the Collection Queue View screen by clicking on the Action Status button.
- Select E Collection Action Codes from the Billing Tables list under Preferences on the Main Menu.
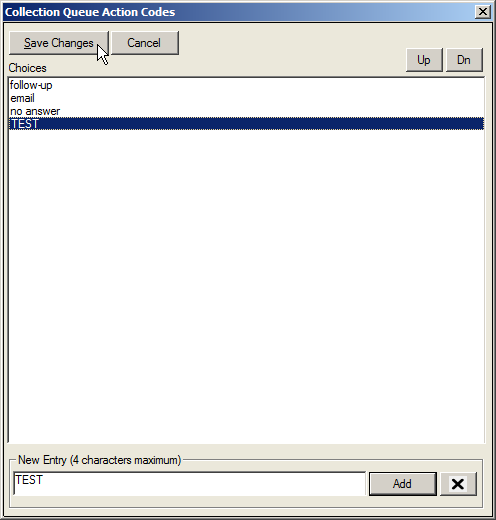
- At the New Entry field on the Collection Queue Action Codes screen, enter an action code.
- Click on the Add button.
Note: This field has a limit of 4 characters.
- Once the list has been completed, click on the Save Changes button to close the screen.
Hold Reason Codes
The Hold Reason Codes are used to quickly assign a Hold Reason Description to a charge that is to be placed on Hold status. The table is linked to the Charge Entry Screen, which will prompt the user for a Hold Reason when the Place on Hold option is selected. Furthermore, the table is linked to the Hold button on the Claims Processing screen and the Hold Codes dropdown on the Charge Review screen.
Select F Hold Reason Codes from the Billing Tables list under Preferences on the Main Menu.
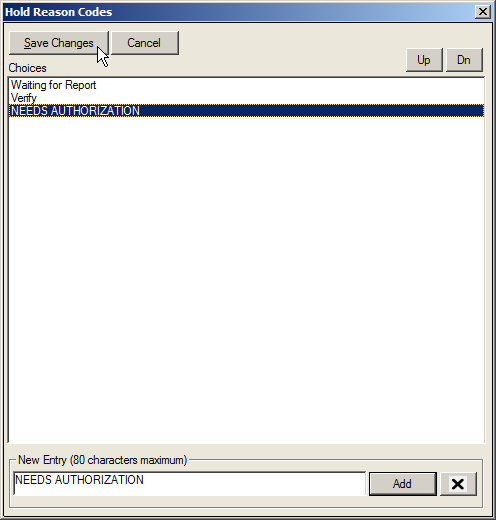
- At the New Entry field, enter a Hold Reason.
- Click on the Add button.
Note: This field has a limit of 80 characters.
- Once the list has been completed, click on the Save Changes button to close the screen.
Payment Denial Codes
Payment Denial Codes are used to record Explanation of Benefits denials in the Payment Entry screen. The information in this table will be used for reporting and retrieval. The table is linked to the Payment Entry Screen and the denial codes are selected from a dropdown list on that screen.
The Payment Denial Codes Table also allows the creation of Custom Deny Codes that can be applied to all patients or per insurance carrier. These Custom Deny Codes will display in the Add Deny Code option of the Payment by Line Item window, which is located in the Transaction History screen. Furthermore, the Payment Denial Codes are viewable in the Day Sheet, Charge Review, Payment Batch Review, and Batch Payment Processing screen.
- Select G Payment Denial Codes from the Billing Tables list under Preferences on the Main Menu.
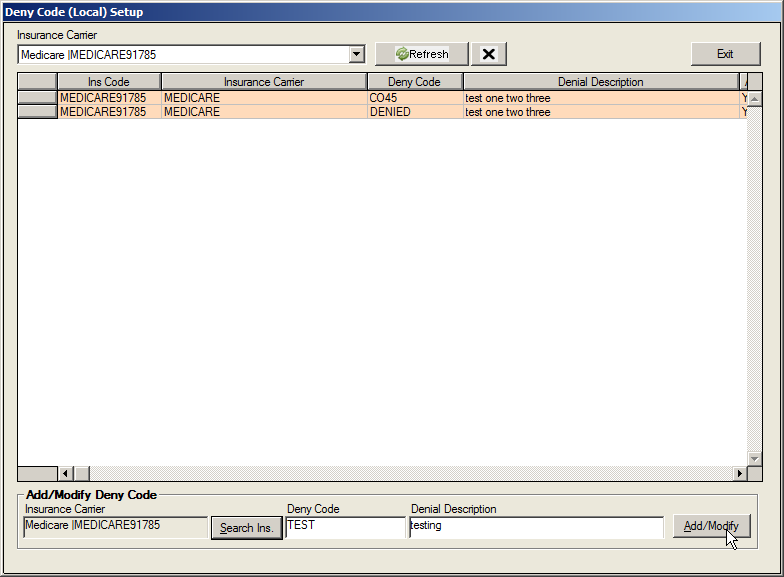
At the New Entry field, enter a denial code.
Click on the Add button.
Note: This field has a limit of 80 characters.
Once the list has been completed, click on the Save Changes button to close the screen.
Modifiers
The Modifiers table is used to define charge reductions taken based on the user of a particular modifier. If a reduction is not to occur, simply enter 100% in the value area. When entering values, please note that a % value of 75 will reduce the charge by 25%.
When a modifier is needed to enhance a CPT (i.e. to define Right Eye), a seven character CPT can also be created in the Fee Schedule. By doing so, the modifier is tied directly to the CPT.
Created modifiers are linked in the Enter Charge, Transaction History, Edit Charge, Day Sheet, Charge Review, Claims Processing, Payments Batch Review, and Batch Payment Processing screens.
- Select H Modifiers from the Billing Tables list under Preferences on the Main Menu to open the Modifier screen.
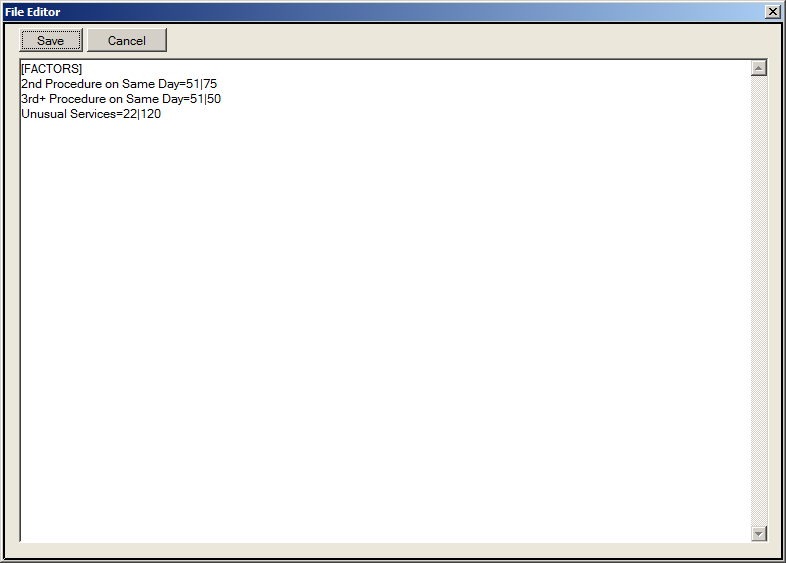
- Move to the bottom of the document and type the new information onto the screen
Note: Entries should be made in the following format: Desc=Mod|% of Charge Amount
- Once completed, click on the Save button to save the information added and to exit the screen.
Billing Alert
Billing Alerts display a warning message to the users who are working in the billing portions of the system. Unlike the other Alerts setup in the system, Billing Alerts do not use the Query Wizard feature. Instead, users must supply an Alert Message and a SQL File containing a SQL SELECT statement.
- Select I Billing Alert from the Billing Tables list under Preferences on the Main Menu to open the Billing Alerts setup screen.
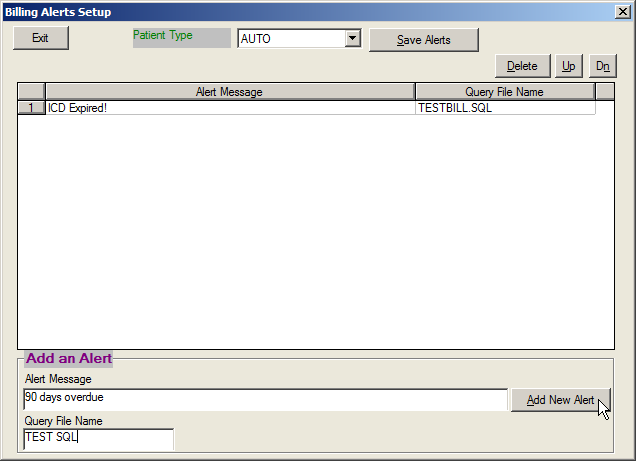
Select the desired Patient Type from the dropdown list.
Enter the new message in the Alert Message field.
Enter the new name of the SQL file in the Query File Name field.
- Click the Add New Alert button.
- Click the Save Alerts button to save the new message.
Remittance Reason Codes
The Remittance Reason Codes table screen allows users to custom designate electronic remittance reason codes as automatic Write-offs and Non-covered Services during the electronic remittance process. Users are not allowed to add new codes and can only edit attributes for known valid codes that have been encountered during 835 ERN file processing. Write-offs and Non-covered services may be designated by single or multiple Insurance Carriers, single or multiple Insurance Plan Types, or for all cases.
- Select J Remittance Reason Codes from the Billing Tables list under Preferences on the Main Menu.
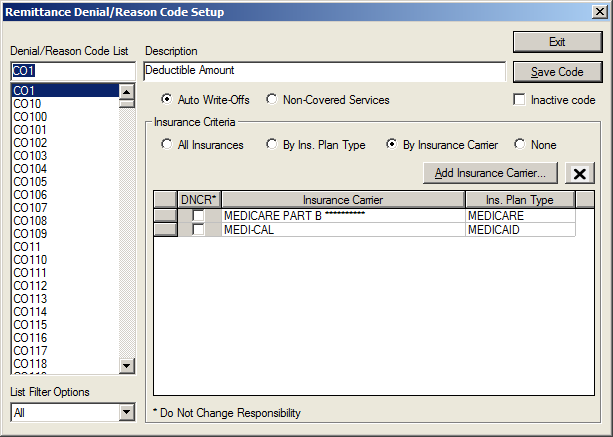
Select the desired Denial/Reason Code from the list on the left.
Edit the Description as needed.
To designate a code as a Write-Off or Non-Covered Service code, select Auto Write-Off or Non Covered Service.
If applying the designation to a particular plan or plans, click on the By Ins Plan Type or By Insurance Carrier Payment Criteria option.
Select the appropriate plan(s) from the Ins Plan Types list on the right side of the screen.
Click on the left arrow to add them to the list screen for the Payment Criteria selected.
Once changes for the items are completed, click on the Save Code button.
Once all changes are completed, click on the Exit button to close the screen
The following Remittance Reason Code Options table outlines the options available on this screen.
Remittance Reason Code Screen Options |
|
Option |
Description |
Denial/Reason Code List |
This portion of the screen displays the Denial/Reason Code entries. When clicking on a code, the selected item is populated in the first field of this area of the screen. |
Description |
Once a code in the Denial/Reason Code section is selected, the description of the code is displayed in this field. |
Auto Write-Off |
If this option is selected for a code and the code appears in an ERA file, the system will automatically write off the difference between the charge amount and the allowed amount. |
Non-Covered Service |
If this option is selected for a code and the code appears in an ERA file, the system will automatically transfer the balance to Patient Responsibility. |
Inactive Code |
When selected for a code, it will no longer appear in the Denial/Reason Code list for user selection. |
Payment Criteria |
This section allows a code to apply to: All Insurances, By Ins Plan Type or By Insurance Carrier. All Insurances allows the code to be available for All Insurance Plans. By Ins Plan allows the code to be available for the plans selected on this setup screen. This is done by selecting the Ins Plan Type listed and using the left arrow to add it to the inclusion list. By Insurance Carrier allows the code to be available for the Insurance Plans selected (using the Add Ins Carrier button to search for and select desired plans) and displayed in the inclusion list. |