PHR
Users Guide
For use with PHR version 5.0.2.41 and higher.
TABLE OF CONTENTS
Launching PHR from the Desktop
Adding Patients Utilizing the “Demographics/Remove” Tab
Adding Patients by the “By appointment” Tab
Creating a Clinical Summary/Transfer of Care/ Ambulatory Summary Document for Export
Adding Patients by a Demographics Search
Importing CCR, CCDA and CCD (c32) files.
Exporting a Patient List for Future Use
Importing a Previously Exported and Saved Patient List for Use
User Settings (This tab reflects the name of the logged in user)
Using Direct Messaging to Transmit a CCDA type Document
Using Privacy Data Systems for Transmitting a CCDA Type Document or PHR Record.
Transaction Log of CCDA Documents Generated for a Specified Patient
1. Find the PHR short cut on the desktop.
2. Double click on the desktop short cut.
3. Login in using your MedInformatix password.
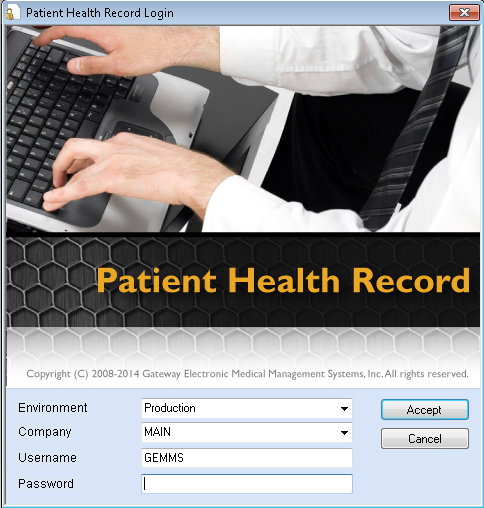
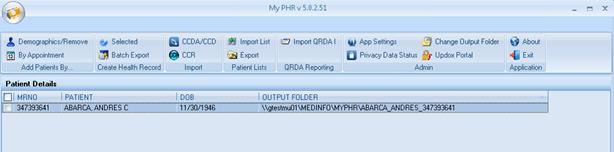
4. When your login is successful you will see the following screen.
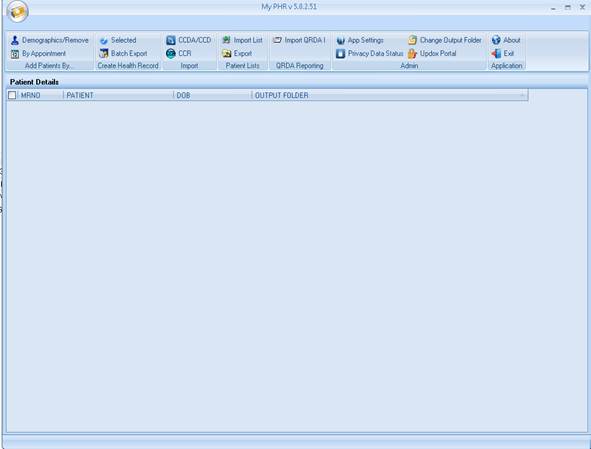
Adding Patients Utilizing the “Demographics/Remove” Tab
This tab allows you choose a single patient or multiple patients for the creation of a CCDA, Clinical Summary, Transition of Care or an Ambulatory Summary.
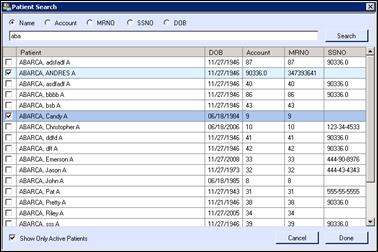
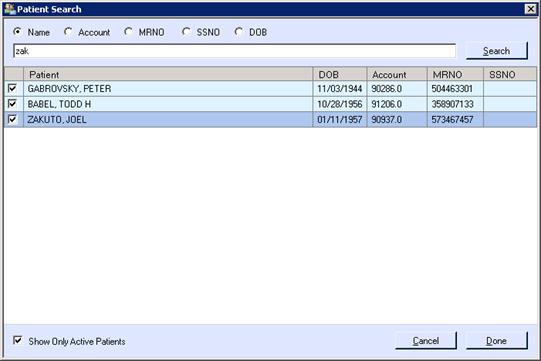
1. Patients can be added by a search of demographics.
2. Patients can be searched for by name, account number, medical record number, social security number or date of birth.
3. Once the search is completed the patients that will have CCDA type documents created are identified by placing a check in the box the left of the patient’s name.
4. Once a list of patients is returned, the Demographics/Remove tab can be utilized to remove unwanted patients from the list that eventually will be used to create the appropriate document.
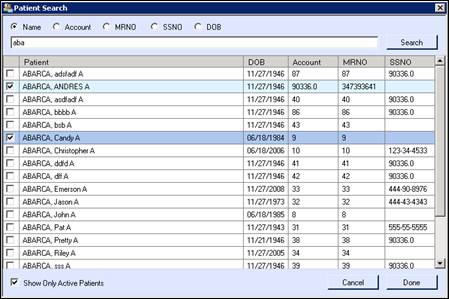
5. Once the selections are completed select the Done button.
6. Now you have a list displayed of the selected patient(s) whom you have chosen for document creation and export. If you do not place a check mark in the box to the left of the patients name all patients on the list will have CCDA type documents created. If you place a check in the box, only those patients with the check mark will have a CCDA type document created.
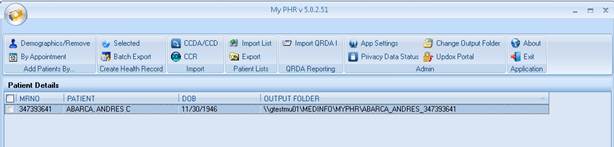
7. Click the selected or Batch export buttons to advance to the next step.
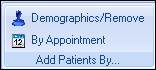
Adding Patients by the “By appointment” Tab
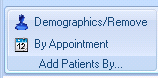
Click the By Appointment button
1. Patients can be added by a search of appointments.
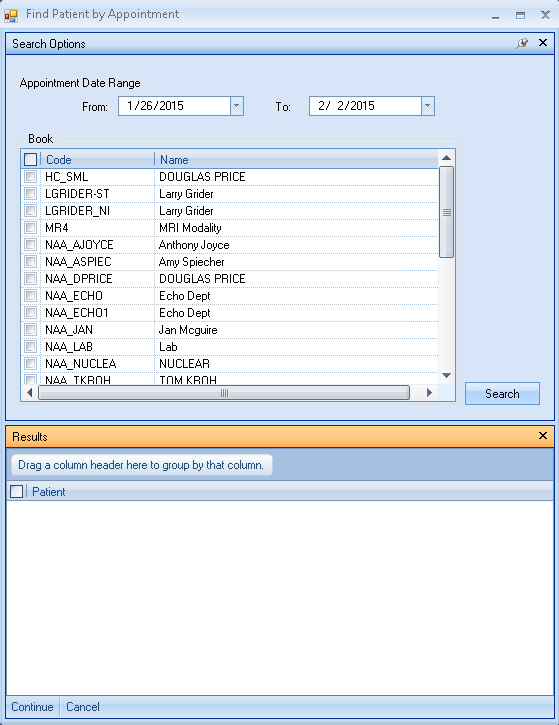
2. Select the By Appointment tab and the following screen will appear to select a date range for appointments and for further detailed search an appointment book(s) can be selected for that date range.
3. Click Save.
4. By placing a check in the box to the left of the patient’s name you select the patients that were returned by appointment range that you wish to create documents for.
5. Click the selected or Batch export buttons to advance to the next step.
6. Now you have a list displayed of the selected patient(s) whom you have chosen for document creation and export. If you do not place a check mark in the box to the left of the patients name all patients on the list will have CCDA type documents created. If you place a check in the box, only those patients will have a CCDA type document created.
Creating a CCD, CCDA, Clinical Summary, Transition of Care or an Ambulatory Summary for a Single Patient or a Group of Identified Patients
PHR allows you to create a CCD, CCDA, Clinical Summary, Transition of Care or an Ambulatory Summary for a single patient or a group of identified patients.
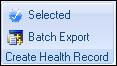
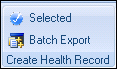
1. Click on the Selected button within the Create Health Record group.
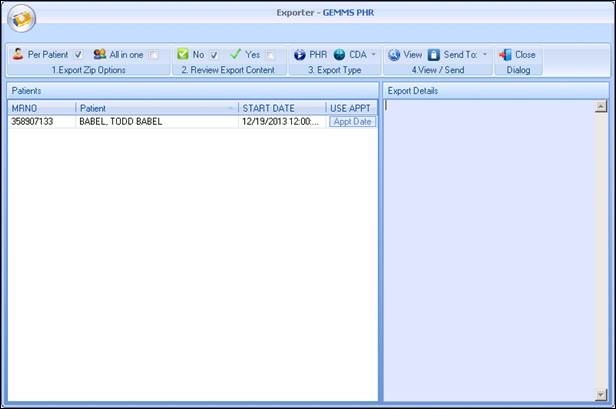
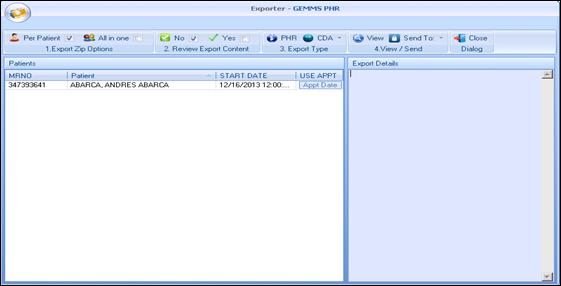
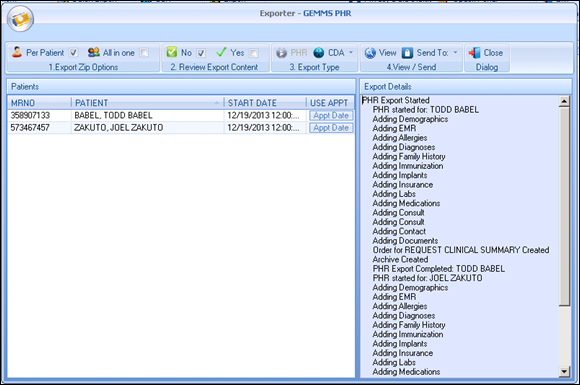
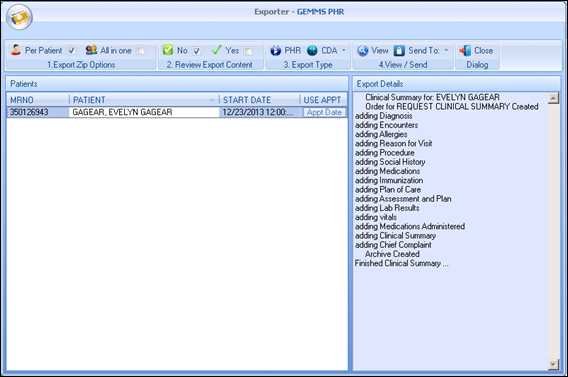
2. The following screen should appear with the selected patient.
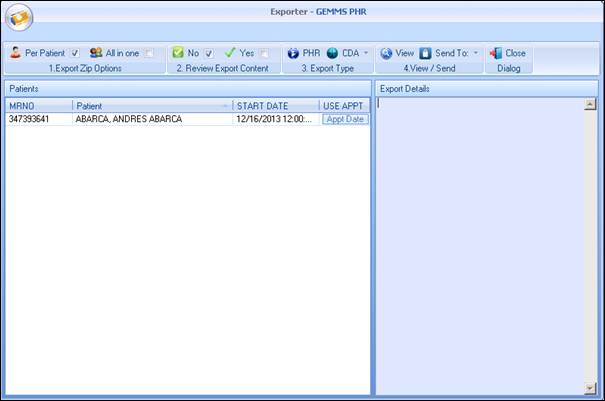
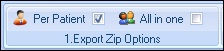
3. Select Export Zip Options

a. Per Patient will create a zip for each patient and save it to the directory specified in the App Settings.
b. All in one will create one zip file with all patient records included.
i. Files zipped as All in one cannot be sent to Updox or Privacy Data Sytems
4. Review Export content
![]()
a. Yes – Allows the user to deselect certain information from the patient document being created for export. If a batch mode is utilized each patient will be reviewed separately before the export document is created.
b. No – Does not allow the user to deselect certain clinical information for exclusion from the document being created.
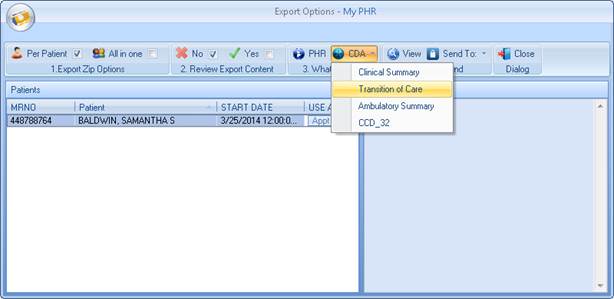
5. Export Type
![]()
This allows you to select the type of file you wish to create. Either a PHR (Personal Health Record) or a CCDA type document may be selected for export.
a. The PHR will export selected chart sections and documents
b. CDA will export a CCD, Clinical Summary, Transfer of Care, or an Ambulatory Summary based upon your choice from the drop down list
****It should be noted the content of each type of document may vary based upon the required inclusion content dictated by CMS.
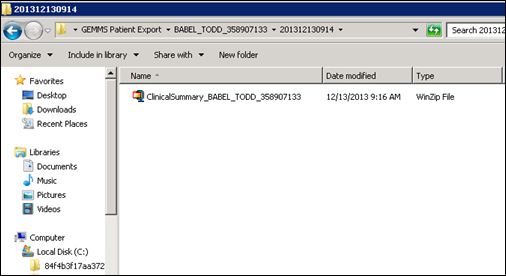
c. Once the selected document has been created and saved to the default folder location specified in the program set up. The Zip file containing the document and style sheet is ready for use. Browse to the folder using Windows Explorer to obtain the patient file.
Creating a Clinical Summary/Transfer of Care/ Ambulatory Summary Document for Export
1. Click the Appt date button for each selected patient. This will allow you to select an appointment date which will limit the information included in the file to the specific appointment date selected.
2. When the Appt Date is clicked a box showing the patients appointments that may be selected to limit the document creation range.
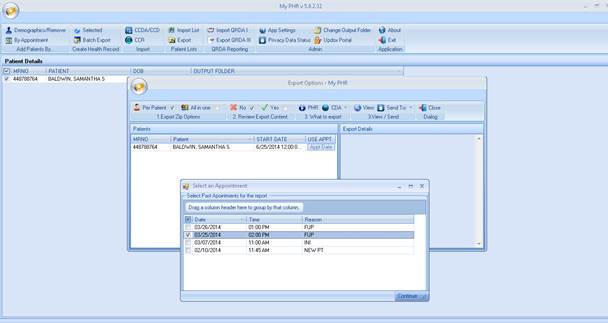
3. Once the appointment has been selected click Continue.
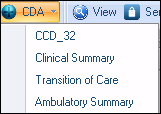
4. Then click the CDA drop down and select desired Record type.
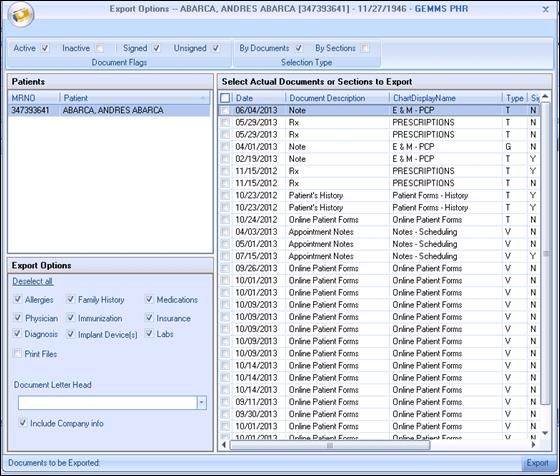
5. If Yes is selected in the Review Export content the following screen will be displayed.
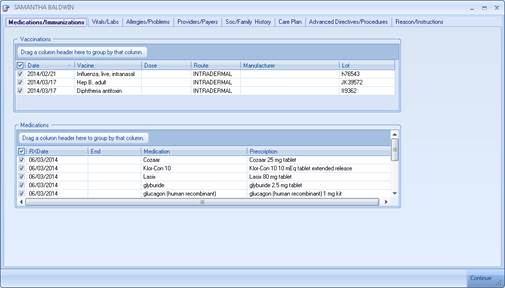
![]()
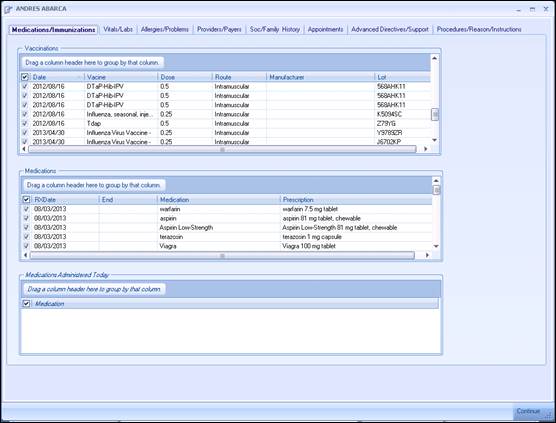
6. The above screen allows you to select information that will be included in the document file that is created for export. By default all information is selected for export. To omit information from the document, uncheck the box to the left of the section or specific item to be omitted. The sections that can be viewed for inclusion into the record include:
a. Medications
b. Immunizations
c. Medications administered today
d. Vital Signs
e. Laboratory results
f. Allergies
g. Problem list
h. Responsible providers
i. Care Team Members
j. Insurance information
k. Social history
l. Family history
m. Past appointments
n. Future appointments
o. Plan of Care
p. Advanced directives
q. Reason for visit
r. Procedures
s. Instructions
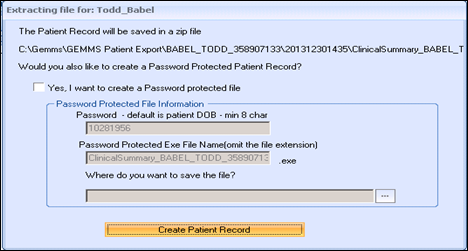
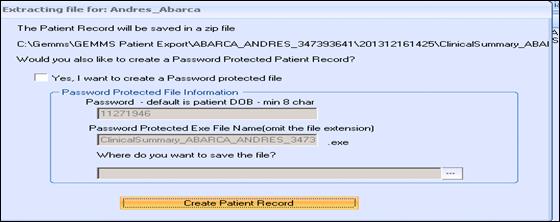
7. Once the document type for export has been selected the following screen will display. This screen allows you to determine whether you would like to create a password protected ZIP file that contains the patient document.
****The user does not need to create a Password protected file. In either case a zip file is created in the default location.
![]() Note: If Winzip is not
installed on the computer, the dialog will not appear.
Note: If Winzip is not
installed on the computer, the dialog will not appear.
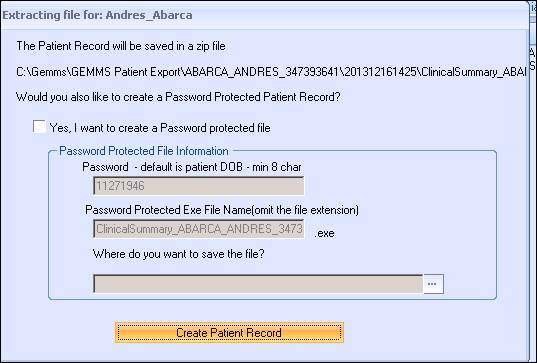
8. If Yes is chosen, you are given the opportunity to specify a path where the document will be saved for retrieval and attachment to a secure messaging portal.
9. The default password will be the patients birthdate in the following format:
Month (2 digit) day (2 digit) Year (4 digit) i.e. 01122014
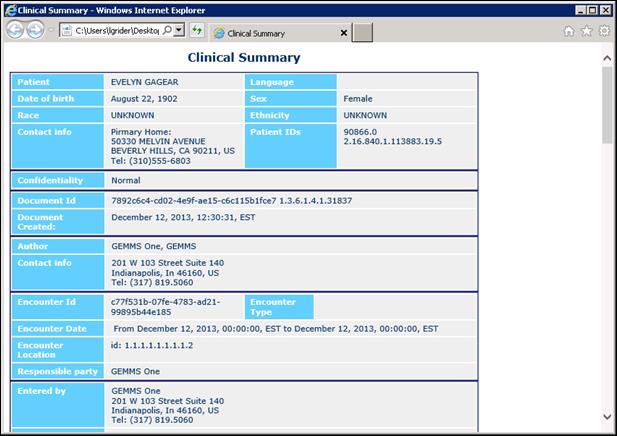
10. The last step is to click the Create patient Record. This will create a Password protected file in self extracting executable format. Within the zip file is the patient record in an xml format patient record and style sheet which renders the xml file into a human readable format. When the user selects the zip file for viewing a dialog box requests the password. The executable then unzips the files to a given location and opens the record in the browser.
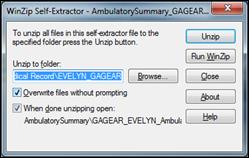
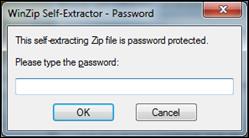
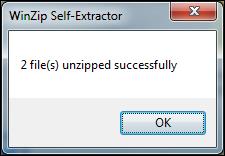
11. Below is the sequence of screens you will see from creation to viewing of the password protected zip file.


Creating a PHR
This feature allows you to create a complete medical record which not only contains the equivalent of the CCDA, but also chose to include documents from the EHRs document repository. This file can be created and contained within a password protected zip file for distribution to patients or 3rd parties that request the complete medical record.
Adding Patients by a Demographics Search
1. Patients can be added by a search of demographics.

2. Patients can be searched for by name, account number, medical record number, social security number or date of birth.
3. Once the appropriate patients are identified they are selected by placing a check in the box the left of the patient’s name.
4. Once a list of patients is returned, the Demographics/Remove tab can be utilized to remove unwanted patients from the list that will be used to create the appropriate document.
5. Once the selections are completed select the Done button.
6. Now you have a list displayed of the selected patient(s) whom you have chosen for document creation and export.
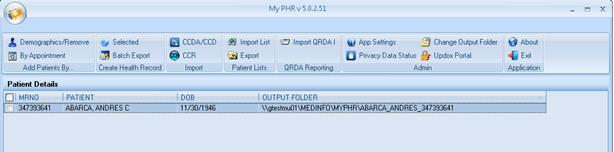
7. Click on the selected button within the Create Health Record group
8. The following screen should appear with the selected patient(s).
9. Select Export Zip Options
a. Per Patient will create a zip for each patient and save it to the directory specified in the App Settings
b. All in one will create one zip file with all patient records included.
10.Review Export content
![]()
a. This is just for the CDA documents. The PHR always allows the user to pick export options.
b. Yes – Allows the user to deselect certain information from the patient chart. If a batch mode is utilized each patient will be reviewed separately before the export document is created.
c. No – Does not allow the user to deselect certain information
11. Choose the PHR button.
![]()
The PHR will export selected clinical information as well as any documents selected from the patient’s document repository. When the PHR button is selected will be asked to select the desired information for inclusion in the export file. Also a letter head can be specified for attachment to documents created by the EHR.
NOTE: When multiple patients are exported, to select the clinical data and documents to be included, click on the patients name to have an inclusion screen specific to that patient.
12. Before export the user is asked if they want a password protected file created. Check Yes if password protection is required.
13. When completed the following information and screen should be present.
Batch Export
This function allows you to create an export of all patients contained within the medical database in the CCDA format. No documents from the EHR repository are included in the export. This is designed to create an XML CCDA on each patient that could be utilized for import into another certified EHR.
1. Click on the Batch Export button on the main screen. This will present an option screen that allows you to select all active patients, date ranges which will limit the export to patients seen in a specific time period and an option to define the location where the files will be stored.
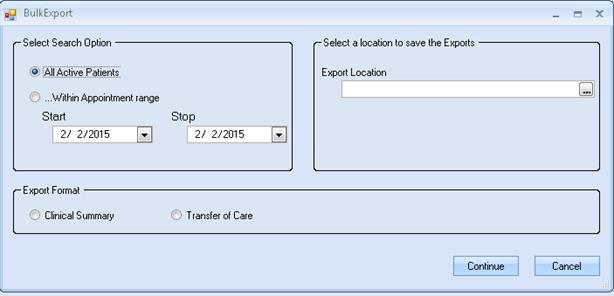
Warning: Exporting All Active patients will cause a significant degradation in the speed of the EHR for end users. It is recommended that this only be utilized during non-business hours. This export could require days to run, depending on the number of patients exported.
During the export a timer and number of patient files which will be created for export are visible to you.

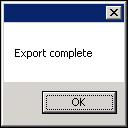
When the export is complete the following message will be visible.
Importing CCR, CCDA and CCD (c32) files.
PHR allows the user to import CCR, CCDA and CCD (c32) files.
It should be noted that the CCR is a legacy format that is supported with limited functionality. The current standards for document exchange require the use of the CCDA.
Importing a CCR

1. Click the CCR button.
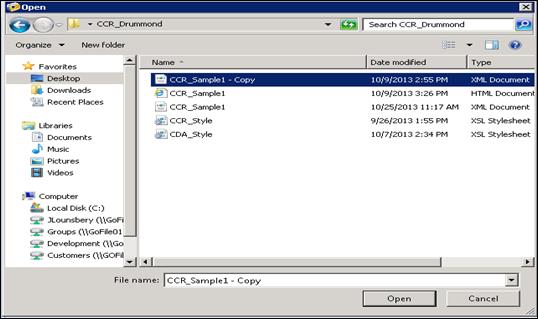
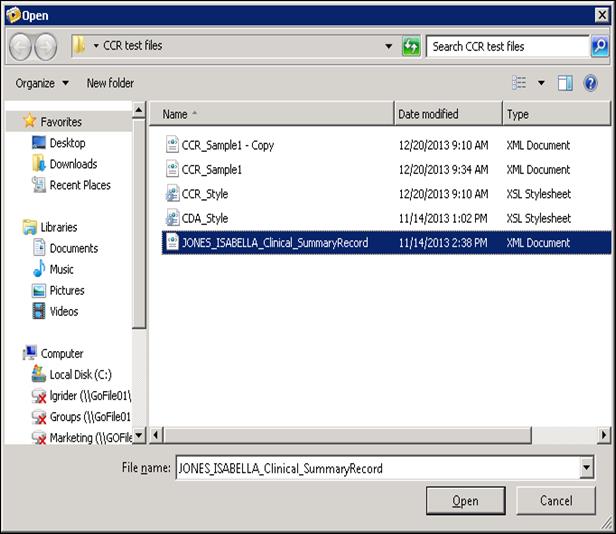
2. The following screen will ask you to browse to a folder where incoming CCR files are located. Once you have chosen the file to import click the open button. Note: Incoming CCR files must be copied to a location prior to starting the import process. Typically these files will arrive by some form of secure email and should be saved to the desired folder which you can access.
3. If the file chosen for import is not a valid CCR the program will warn you and not allow the importation
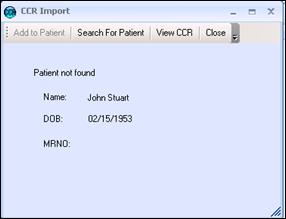
4. PHR will try to match the file with a patient in the system.
5. If the patient is not found within the current system you will be prompted to either search for the patient and link the incoming CCR or create a new patient prior to importation of the CCR
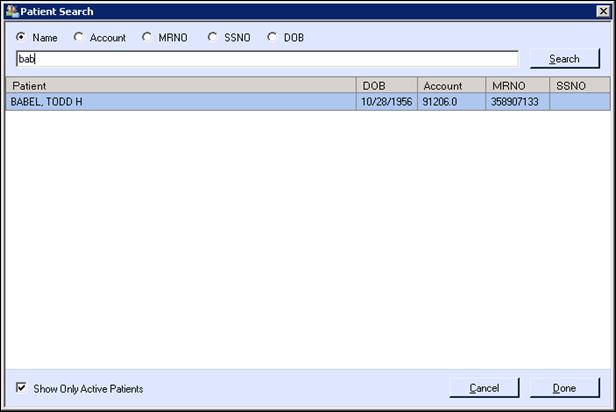
6. Utilizing the Search button the patient can be searched for and linked to the incoming CCR file you desire to import.
7. If the patient is not found you must utilize the demographics screen in GEMMS|ONE to create a new patient prior to importing the CCR.
8. If a patient is found that is an exact match within the EHR, the Add to Patient button will be enabled. The CCR can be viewed prior to import by clicking the View CCR button.
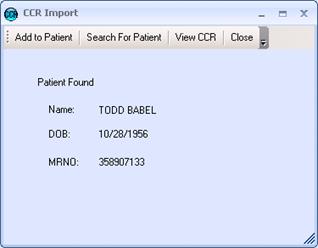
9. You may view the CCR prior to placing it into the patient’s document repository in the EHR by clicking the View CCR button.
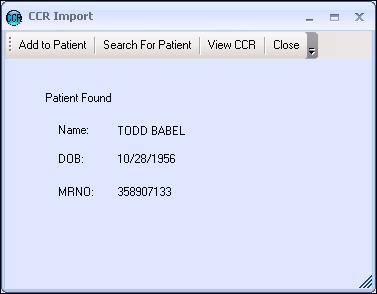

It is important to remember that the CCR when imported is placed directly into the document repository and will not allow data to be imported from this type of file.
Importing a CCDA or CCD
The import of the CCDA is a robust feature that allows the file to imported and incorporated into the patient’s clinical data elements as desired. A human readable copy is also placed in the document repository of the EHR.
1. Click the CCDA/CCD button and browse to the location where incoming CCDA files are located. Note that these files will arrive by a secure messaging system and need to be saved to a directory that is accessible from you computer.
2. The PHR module will attempt to match the patient named within the CCDA to existing patient with a current medical record. If no match is found you will be prompted to either search for the patient and link the CCDA to an existing patient or create a new patient to allow the import of the CCDA.
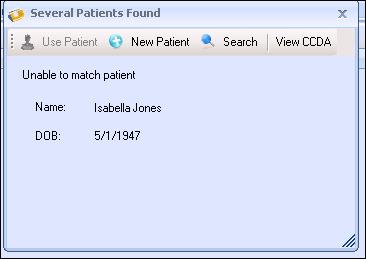
3. To add a new patient, click the New patient button. You may also view the CCDA from this screen to better clarify who the patient may be by clicking the View CCDA button.
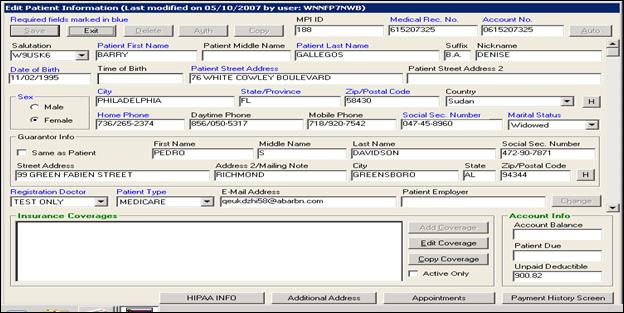
4. The following screen will appear with the demographic fields populated with information contained in the CCDA.
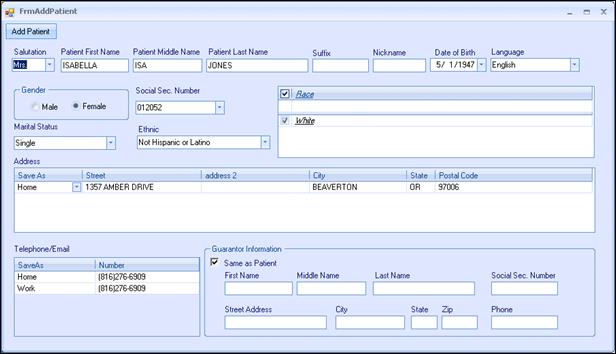
5. Any changes to the displayed demographics can be made at this time. Once you are satisfied with the information click the Add Patient button to create the new patient in the EHR and practice management system.
6. Once the patient is either found or created as a new patient, the clinical data available for importation into the EHR will be displayed. At this time you can now compare existing medications, allergies and problems that are currently in your EHR to those listed in the CCDA. By following the simple process outlined below selected information may be merged from the CCDA to the patients existing EHR clinical data.
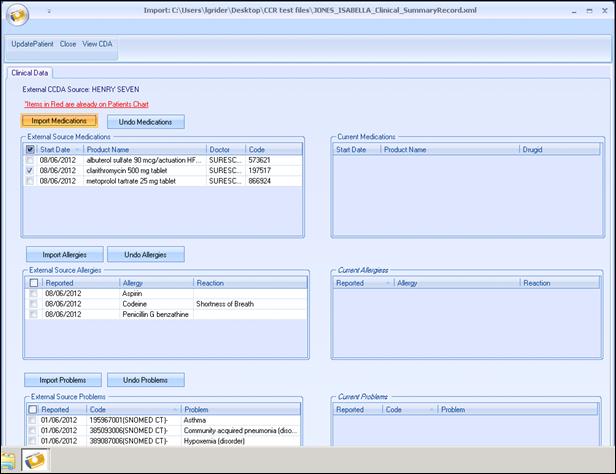
7. Importing Medications-once you have reviewed the information contained in the CCDA and the current EHR record you may select all of the medications or individual medications to be imported and merged with the patient’s current medication list.
8. Place a check mark in the box to the left of the medication you would like to merge and then select the Import Medications button.
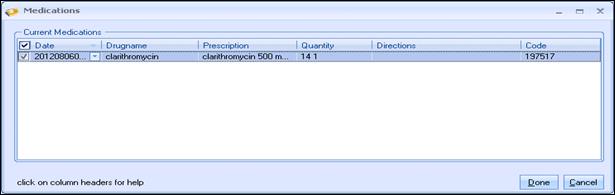
9. Once the Import Medications button is clicked the following screen will be displayed to allow you to verify the drug for import. The medication must again be selected by clicking the check box to the left of the medication. This is a safeguard to prevent the unintentional merger of a medication. Once you have again selected the medication and click the Done button.
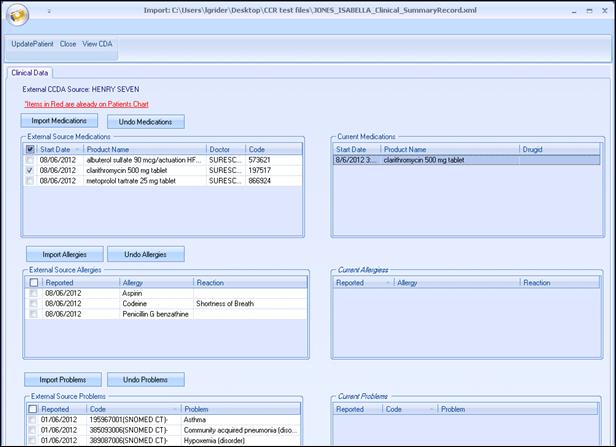
10. The medication is now added to the patient’s current medication list within the EHR. If the medication was entered in error it can be removed by clicking the Undo Medications button. This will remove the medication from the patient’s EHR.
11. Allergies and problems can be imported utilizing the same methods as described for importing the medications with two exceptions.
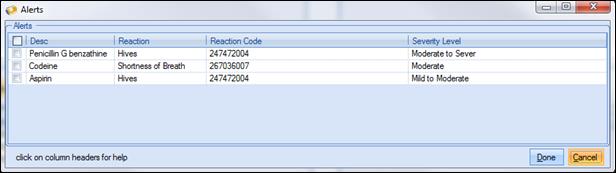
12. When importing allergies, once the selected allergy has been queued for import into the EHR you MUST select a severity level for the allergy being imported. This is accomplished using a drop down menu and selecting the appropriate choice.
13. When importing a problem the same process is used as in the importation of medications and allergies with one exception. When you receive a CCDA the problems will most likely not have an ICD 10 code. The standard for the CCDA is Systematized Nomenclature of Medicine (SNOMED). SNOMED is a systematically organized collection of medical terms computer is able to process providing codes, terms, synonyms and definitions used in clinical documentation and reporting.
14. In order to allow the problem to be utilized for billing purposes an ICD 10 must be linked to the problem prior to import.
15. By clicking the Search button under the Find ICD 10 tab, the PHR module will display a list of possible ICD 10 codes that match the SNOMED code.
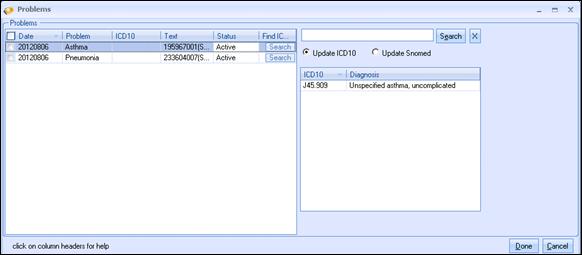
16.Double click on the ICD 10 code you would like to link to the problem.
17.You also may search for a SNOMED code if you select the Update SNOMED radio button.
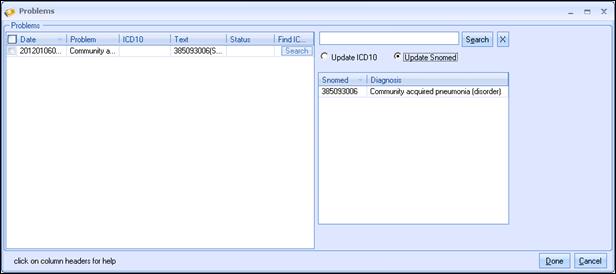
18.To merge the problem into the EHR, click the Done button.
Exporting a Patient List for Future Use

The patient lists tab allows you to create lists of patients for future reuse. This list could be for a specific doctor, facility or referring physician. Once a desired list of patients is created, the list can be exported and saved for future use, thus eliminating the need to look up patients and recreate a list that is used frequently.
1. Create a list of patients utilizing the features previously discussed in Add Patients by.
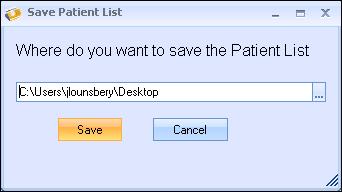
Once the patients are selected go to the Patient Lists tab and select Export
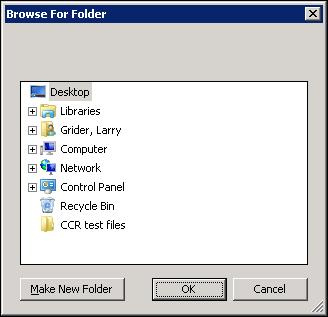
2. The following screen will appear and give you the opportunity to create a new folder or map to an existing folder to save the list in. The list will be saved in an XML format that can be imported for later use.
Importing a Previously Exported and Saved Patient List for Use
1. To import a patient list. Click on the Import List button.
2. You will be prompted to choose a location where the desired file was previously saved.
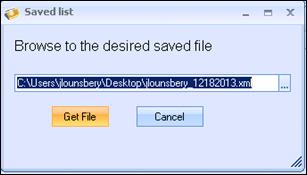
3. Once the file is selected click the Get File button to import the file into the master list view.
4. The imported list is now ready to use
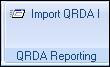
Importing QRDA 1 Files
When a third party application, such as a patient portal is being utilized, that application must submit a QRDA 1 file formatted data for importation into the EHR, thus allowing calculations and successful reporting to occur for meaning use stage 2.
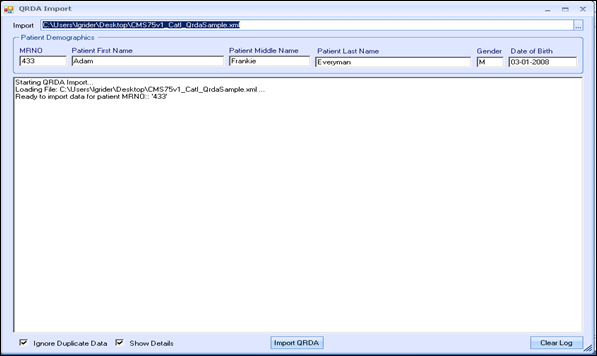
1. Click on Import QRDA 1
2. The following screen will appear which allows you to browse to the folder and file you wish to import.
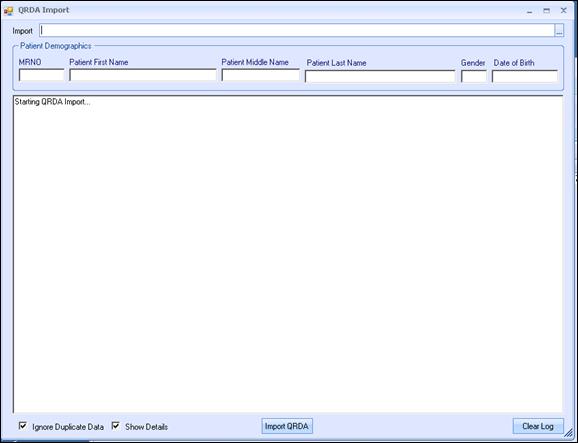
3. Browse out to the location of the QRDA file(s) you wish to import to the Measure and CQM calculation table within the Medical database by clicking on the box to the far right of the import field. Once the file is identified and selected click the Open button to import the file.

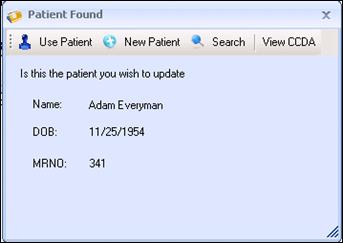
4. Next you will be prompted that there is a patient match or that the patient currently does not exist in the system. If the patient is matched the next step is to click the Use Patient Button. If the patient is not matched add the patient to the Practice management system utilizing the New Patient button.
5. Once the patient is either linked correctly or established as a new patient the system will tell you that the QRDA file is ready for import. When you are ready to import the file click the Import QRDA button.
6. Once the QRDA file is imported the summary report of data that was extracted from the XML file and stored in the MU reporting table with a message that the import is completed.
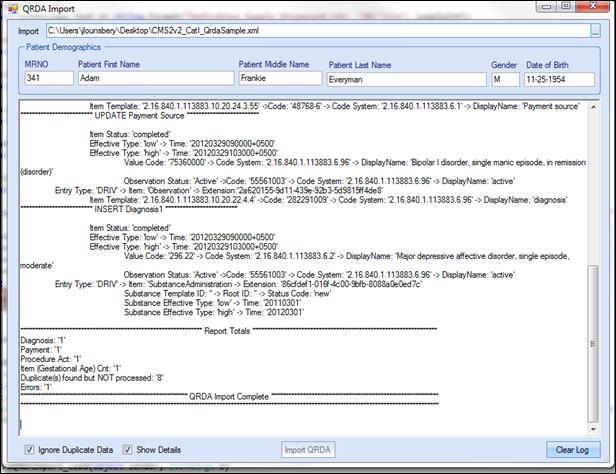
7. Once you have finished use the Clear Log button in the lower right hand corner to clear the screen.
Application Configuration
App Settings
The application settings contain 5 sections:
1. Import/Export
2. Secure Send
3. Chart Section
4. Company
5. User Settings (This tab reflects the name of the logged in user)
****If a user does not have a Security level of System Supervisor Rights, they will only be able to see the User Settings tab
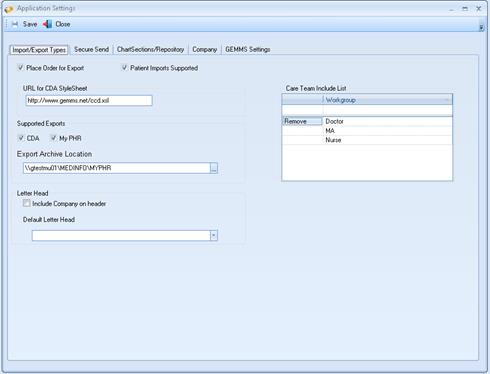
Import/Export Types
1. Place Order for Export:
This will create an Order for the CCDA, PHR and CCD.
2. Patient Imports Supported
Allows the application to import CCDA, CCR, and CCD documents. CCDA and CCD documents can be converted to data elements such as medications, allergies and problems for import into the existing patient record. The corresponding document can be added to the document repository as a virtual document.
****A CCR can only be imported as a virtual document*****
3. Supported exports
This allows the creation and export of the CCDA, CCD, Clinical Summary, Transition of Care, Ambulatory Summary documents.
4. PHR
Allows the exporting a Personal Health Record that can include selected documents from the document repository.
5. Export Archive location
Every CCD, CCDA and PHR is archived. This path is a global setting. The location of the archive folder should be located on a server and each user should have access to that folder.
6. Letter Head
When exporting a PHR text files generated by the EHR can have a letter head applied to the document.
7. Care Team Include List
Only users within these groups will be listed on the Care Team section of the CCDA.
Secure Send
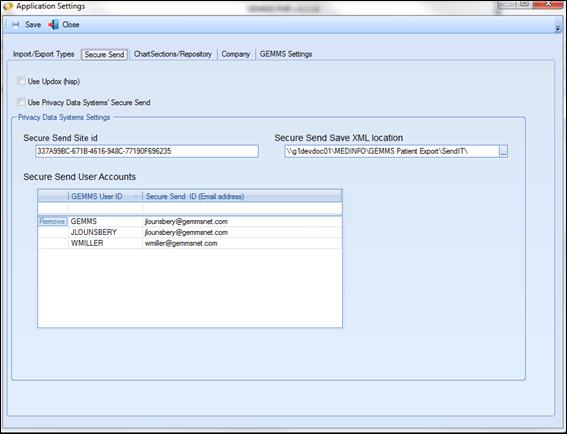
1. PHR can support the use of either Privacy Data Systems as a secure email or be configured to utilize Updox for direct messaging. Both of these secure messaging routes require appropriate licensing and installation of these products prior to use.
****Only Updox utilizes Direct Messaging as required for Stage 2 Meaningful Use. ****
2. For Secure Send utilizing Privacy Data Systems, the client must obtain valid email address from Privacy Data Systems for each user and a practice “site id”. There also must be folder for Secure Send to retrieve the files. This should be configured as a network share.
3. Updox has a separate configuration application.
Chart Sections/Repository
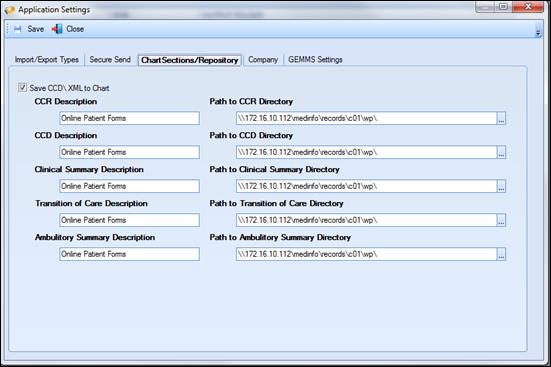
1. Check the” Save to Repository” box if you would like the created CCDA placed in the patients chart. Paths for CCR, CCDA, Clinical Summary, Transition of Care and Ambulatory Summary can be configured individually.
2. Importing the CCR will also save to the document into the EHR document repository. Make sure this directory is also configured.
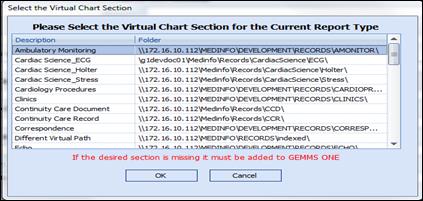
This view shows currently configured chart sections within the EHR.
These fields cannot be edited from this view.
Company Tab
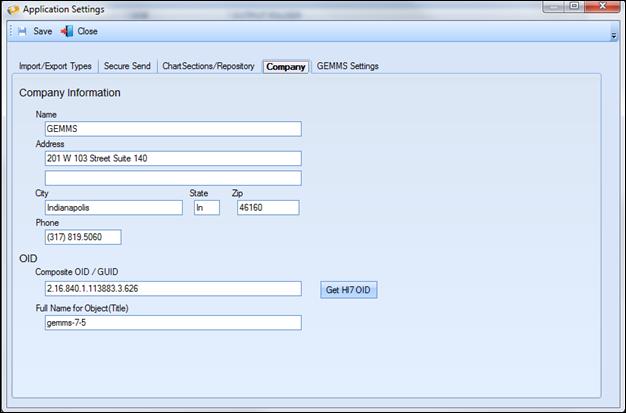
1. Enter the practices name and address.
2. OID (object identifier or OID is an identifier used to name an object ) – This will be used in the creation of all outbound CCDA type documents and is a distinct identifier for your practice. Either enter the OID for GEMMS or click “Get HL7 OID” button to register the practice and obtain a distinct OID.
User Settings (This tab reflects the name of the logged in user)

The application uses the Local Registry to locate the WinZip products. Sometimes during install, the registry is not updated. In those cases a path must entered to the directory where the WinZip programs are located. Check the “Set Path for WinZip” check box. Browse to that location and select the file. This is a user specific setting and only needs to be set for computers where the registry is not updated.
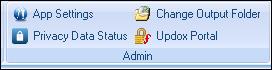
Change Output Folder
This will change where the patient record will be saved. For your current logged in session session only.
1. Click the
![]() button
to find the folder you would like to save the document in.
button
to find the folder you would like to save the document in.
2. Click save to place all files you desire to save in this folder for this logged in session only.
Using Direct Messaging to Transmit a CCDA type Document
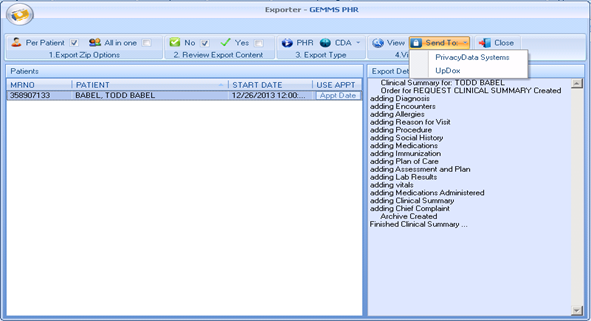
1. Once a document has been created and you are ready to send it to a designated recipient you would click the Send to: button.
2. You will select the UpDox button.
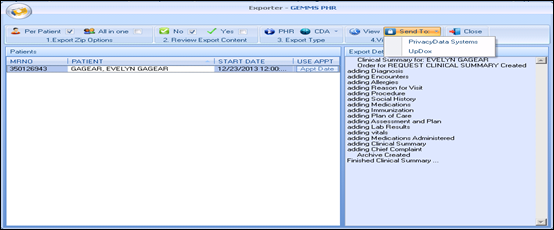
3. You then will be launched to the following screen where the patients file is attached in a zip format.
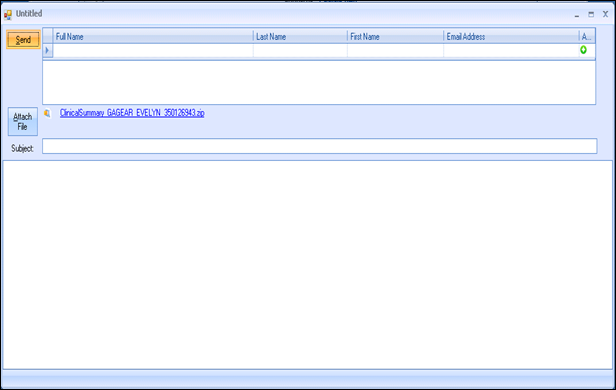
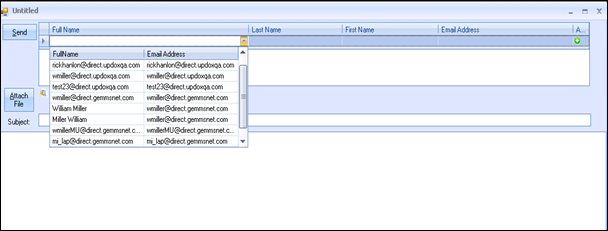
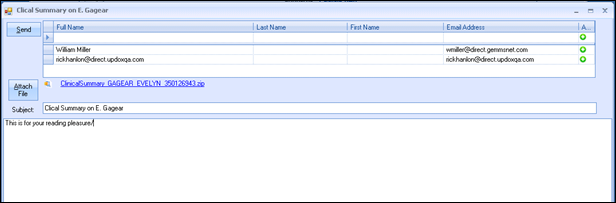
4. Next you will enter or choose recipients direct mail address from your address book, or you may create a new recipient. You may select multiple recipients to receive the document.
5. When you have completed choosing the recipients, typing any text message and completing the subject line click the Send button.
6. Once the message is sent you will see the following confirmation box.
Using Privacy Data Systems for Transmitting a CCDA Type Document or PHR Record.
***Note that this feature requires a subscription to Privacy Data Services, and is not included as part of meaningful use. This feature allows you to transmit protected health information in a secure manner to individuals who may not participate in the Direct Messaging protocol.
1. Click on the Send To button. The following screen will be displayed. Select Privacy Data Systems button to launch the secure email screen.
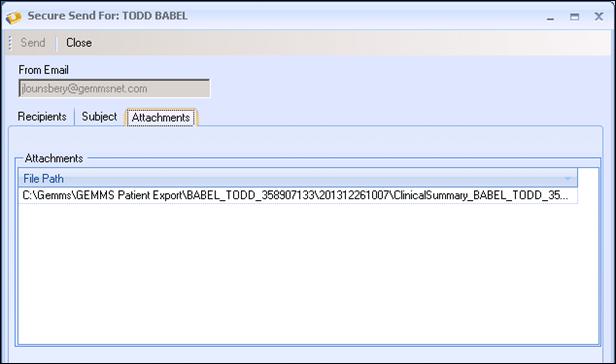
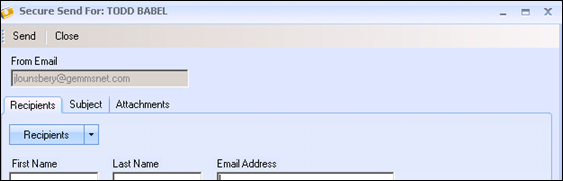
2. Once the Privacy Data Systems button is clicked the email screen will appear. This screen contains 3 tabs:
a. The tab for entering the recipient(s) of the secure email.
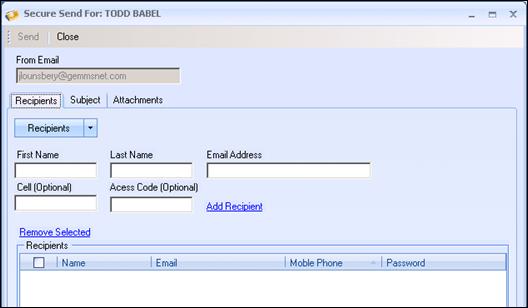
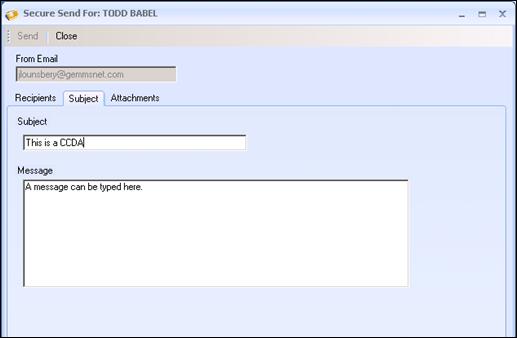
b. The Subject tab where a message can be typed.
c. The Attachment tab where the document that will be sent is listed
3. Once all information is entered correctly the Send button will activate. Click the Send button to route the secure message to the desire recipient.
4. The recipient will receive an email that appears as the following. By clicking on the secure link they can access the message and attachments.
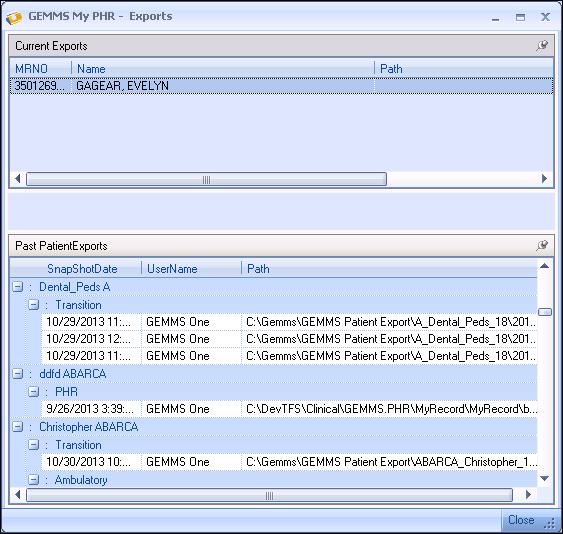
Transaction Log of CCDA Documents Generated for a Specified Patient
![]()
![]()
1. When the View Button is clicked a log of all generate messages by PHR is displayed for the current patient. This is only for viewing and cannot be printed directly from this screen.